Tuesday, March 4, 2008
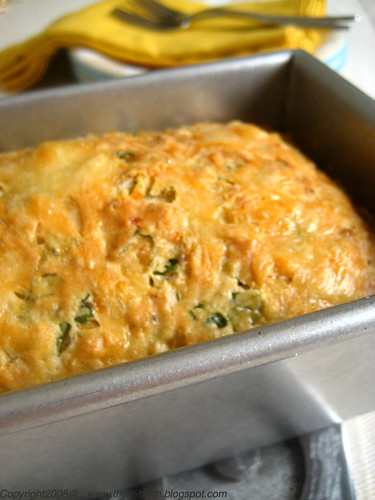
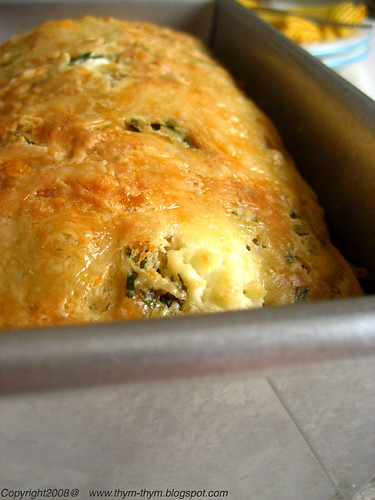
Savory Cheddar, Goat Cheese and Cilantro Cake / Cake Salé aux Cheddar, Fromage de Chèvre et Coriandre
I don’t remember which one came first: cooking, or the words that came with the recipes.
My mother had a small collection of pocket size French Cookbooks that I loved reading. The cookbooks had no pictures and no stories, just recipes, words and may be some drawing here and there. Yet, these books played a major role in the life of a teenage girl who wanted to learn the art of cooking.
Leafing through a cookbook that has no pictures, I was more drawn to a recipe that calls itself “Pain Bourguignon”, “Braised green lentils on a bed of Escarole”, “Anna potato cake” or even “Eggs en Cocotte” than to the ones with a less phonetic impact. Once I gave my poor siblings a taste of what was at the time my obsession with the word: Pilaf. Say it again, slowly: P-I-L-A-F! The way the tongue caresses the palate gently makes it sound more mystifying and delicious.
One sunny Friday, when my parents said they would be away for the afternoon, and that they might be late for supper, I nodded my head religiously to my mother’s leftover-reheating recommendations while the word Pilaf danced sensuously and discreetly in my mind. Once my parents had left, I had my rice, my onion, my chicken stock and my seasoning on the counter top. I was a girl on a mission.
The rice was beautiful, served in a royal blue glass dish, fluffed with a fork and decorated with some chopped parsley. I sat in my Mother’s place and served my siblings some of the rice and the other leftovers. I was proud of my self. Even more proud to explain my siblings how this wasn’t any kind of rice, this was P-I-L-A-F Rice! (With the tongue rolling, of course!)
The first bite was a little unexpected. But I decided to stay quiet and continued on with another spoonfuls, hoping that my siblings wouldn’t notice. Then my older sister put down her fork. “It’s undercooked, some grains are still raw,” my sister said, and went on to eat my mother’s leftovers.
“No, it’s not undercooked, it’s Al-dente” (Another word that I loved using at that time, too!)
Then my younger brothers followed and I couldn’t convince them anymore to eat it; even when I asked them to fish the raw grains out.
I almost finished my plate, but inside I was devastated with the knowledge that I have made a mistake somewhere in the recipe. I served my family a dish of partially raw rice and tried to make them believe that this was how the dish was to be served: Crunchy Pilaf!
Ever since this episode, I have learned how to make Pilaf Rice properly. But I still love using beautiful, exotic names for my dishes to impress the crowd. Even though the recipes are still the same. Somehow, I find it more alluring to introduce this Savory Cake as a Savory Cheddar, Goat Cheese and Cilantro cake than: Savory Quickbread, which is just what it is in reality. But much more.
I made this recipe from Dorie Greenspan’ Serious Eats chronicles: Baking with Dorie. The cake is simply marvelous and oh, so easy to make. You basically whisk all the dry ingredients together in a bowl, the wet in another, and then you gently combine the two. Pour, bake, let it cool, and you’ve got yourself a moist, delicious and cheesy cake that would make any novice baker proud. The only minor changes that I made to the original recipe was to use a mix of white whole-wheat flour and all-purpose flour, to use cilantro instead of chives (it was a manner of availability) and to use goat cheese for its fresh note. I love to serve this savory cake with salads, or as a toast for my sandwiches. After a few days, when it dries out, I like to slice it, toast it, and dice it into croutons to garnish my salads or soups.
Savory Cheddar, Goat Cheese and Cilantro Cake
Recipe: Adapted fom Here
- 1cup all-purpose flour
- ¾ cup white whole wheat flour
- 1 tablespoon baking powder
- 1/2 to 1 teaspoon salt (it depends on what cheese and add-ins you're using. I used 1 tsp)
- 1/4 teaspoon freshly ground black pepper (or more to taste; you could even add a pinch of hot pepper)
- 3 large eggs, at room temperature
- 1/3 cup whole milk, at room temperature
- 1/3 cup extra-virgin olive oil
- 3 ounces coarsely grated cheddar or other cheese
- 2 ounces fresh goat cheese or other cheese, cut into very small cubes
- 1/2 cup chopped cilantro or other herbs
- 1/3 cup toasted walnuts, chopped (optional)
Put the flour, baking powder, salt, and pepper in a large mixing bowl and whisk the ingredients together to combine. Put the eggs in another mixing bowl; whisk for about 1 minute, until they're foamy and blended. Whisk in the milk and olive oil.
Pour the wet ingredients over the dry ingredients and, using a sturdy rubber spatula or a wooden spoon, gently mix until the dough comes together. There's not need to be energetic—beating the dough toughens it—nor do you need to be very thoroughly. Just stir until all the dry ingredients are moistened. Now, stir in the cheese, grated and cubed, the herbs and the toasted walnuts, if you're using them. You'll have a thick dough. Turn the dough into a buttered loaf pan and even the top with the back of the spatula or spoon.
Slide the loaf pan into a 350F-preheated oven and bake for 35 to 45 minutes, or until the bread is golden and a slender knife inserted into the center of the loaf comes out clean. Transfer the pan to a cooling rack, wait about 3 minutes, then run a knife around the sides of the pan and turn the loaf over onto the rack; invert and cool to room temperature right-side up.
The cake can be served when it is still slightly warm, but like Dorie herself, I prefer it when it has cooled completely.
Well wrapped, the cake will keep for about 2 days at room temperature or for up to 2 months in the freezer (thaw in the wrapper). It is normal that the cake may seem a little dry after a couple of days. At that point, it's good to toast the slices. I like to use them as little croutons in my salad and soups, too.
Cake Salé aux Cheddar, Fromage de Chèvre et Coriandre
In Francais Please: Adapté d'ici
- 110g de farine
- 100g de farine blanche complete
- 1 petite c.s de levure chimique
- ½ a 1c.c de sel (tout depends du fromage que vous utilisez et de ce que vous voulez ajouter. J’ai mis 1 c.c)
- ¼ c.c de poivre noir faichement moulu
- 3 gros oeufs, a temperature ambiante
- 100ml lait entier, a temperature ambiante
- 100ml d’huile d’olive extra vierge
- 85g de cheddar, grossierement rapé
- 50g de fromage de chevre, coupé en en dés
- 125ml coriandre, haché
- 100ml noix, grossierement hachées (facultatives)
Dans Une grande jatte, mélanger les farines, la levure, le sel et le poivre. Dans un autre bol, battre les oeufs pendant un minute jusqu’à ce qu’ils deviennent mousseux et bien incorporés. Ajouter le lait et l’huile d’olive.
Verser tous les ingredients liquides sur les ingredients secs, et mélanger doucement à l’aide d’une spatule ou une cuillere en bois. Ne pas trop mélanger ou le cake sera dur et sec. Ajouter le fromage rapé et le fromage de chèvre en cubes, les noix et Mélanger encore. Votres pate sera épaisse. Verser la pate sur un moule à cake beurré et lisser la surface du cake à l’aide d’une maryse ou le dos d’une cuillere a soupe.
Glisser le cake au four, et faire cuire à 180C pendant 35-45 minutes ou jusqu’à ce que le cake soit doré et qu’un couteau inséré à l’interieur du cake en ressort propre. Laisser le cake dans sans moule pendant 3 minutes, puis démouler sur une grille à patisserie et laisser refroidir à temperature ambiante à l’endroit. Vous pouvez le servir tiede, mais je le préfere tout comme Dorie, completement refroidi.
Bien envelopé dans un film plastique, le cake peut se garder pendant 2 jours à temperature ambiante ou pendant 2 mois au congélateur (décongeler-le en le laissant dans le film plastique). Il est normal que le cake durcisse après quelques jours. A ce stage, il est préférable de griller les tranche en toast (J’aime les griller et les couper en dés pour décorer salades et soupes.
Friday, February 22, 2008
Me and One Easy Dessert / Moi et Un Dessert Facile a Faire
I have been tagged this past week by Jaime and Naomie for a Meme. Basically, I have to share with you 7 things you don't know about me. It was hard to choose. An entire life can't be summed up in 7 lines, but here it is:
- Breakfast is my favorite meal of the day, and I drink at least 2 cups (500ml) of cold milk daily. I hate hot milk; it has to be mixed with coffee or chocolate for me to be able to drink it.
- I have a small collection of cows’ figurines around the house. What once started as a joke between my husband and I has now expended to salt and pepper shakers, kitchen apron, cell phone holder…etc. This cute cow on the photo is my latest baby, given to me by my beloved sister. Thank you very much, Y!
- I speak Arabic, French and English, and understand some Spanish. My husband is way better than me in Spanish and he likes to show it off from time to time just to upset me. Which always works!
- I don’t like Hummus. Although I love Chickpeas. Did you know that Hummus means Chickpea in Arabic? I am sure you all know it!
- I went to law school for one year before finding out that it was boring, corrupted and exhausting. I studied French Literature after that. I enjoyed it very much and miss sometimes my college years.
- I get scared easily. Very, very easily. My husband takes advantage of it a lot, and I am afraid I might have a heart attack one of those days. Not that long ago, thinking I’ve heard some noise in the kitchen, I woke up my husband and sent him to go see if there was something, or most specifically somebody downstairs. I felt really bad about waking him up and decided to go with him (Actually, I was left alone in the bedroom and I was scared that somebody might jump out of the closet. I have a vivid imagination). I followed him, carrying with me a big, heavy…candle that I have on my chest of drawers. He looked at me: “what do you think you’re doing with this candle?” “Well…it was the first thing I saw, and I thought this might protect us if there was somebody downstairs!” There was nobody downstairs that day. But every time I hear a noise in our house, he jokes and reminds me not to forget to take my candle with me.
- I love cheese. Especially Goat cheese, Roquefort, Camembert, Brie, Feta, Gruyere, Ricotta and Comté.
The food bloggers I am tagging for a Meme are:
- Christine, from Holybasil
- Marion, from Il en faut peu pour etre heureux
- Lydia, from The Perfect Pantry
- Aimee, from Under the High Chair
- Shayne, from Fruitcake or Nuts
- Anne, from Foodie Froggy
- Terry B, from Blue kitchen
Today’s recipe is very, very easy to make. The filling can be prepared a day, or even two days ahead and assembled the day you want to serve it. The golden phyllo dough gives this distinguish crunch to the dessert, and the creamy ricotta, infused with honey and cinnamon, adds a bewitching silkiness to the sautéed apples. I used Pink Lady Apples, because I love how both sweet and tangy they are, and how they hold their shape after cooking them. Avoid using ceramic or silicon muffin pans, as they retain moisture and you will end up with a mushy bottom.
You may also like:
Peach and Ricotta Parcels
Ricotta and apples Parcels
Recipe: serves 4
- 8 phyllo sheets, cut in half.
- 1 cup whole milk ricotta cheese
- 2 tbsp honey (use the one you like)
- ½ tsp ground cinnamon
- 1 gg
- 1 Pink Lady apple (or any excellent cooking apple), peeled, cored and diced
- 1 tbsp sugar
- 3 tbsp melted butter.
- 1 tbsp ground pistachios (optional)
Using a whisk, mix the ricotta with honey, ¼ tsp ground cinnamon and the egg, until well combined. Set aside. On a medium flame, Heat a teaspoon of butter in a pan, and sauté the diced apples with the remaining cinnamon and the sugar until lightly golden brown on the edges, about 5 minutes.
Brush the muffin pan with a little bit of melted butter. Brush the phyllo sheets with some of the remaining butter and line each muffin cup with four phyllo sheets. Put inside each phyllo “nest” a layer of ricotta, a layer of apples and top with a little of pistachios. Fold the phyllo sheets over the filling as you would fold a bag. Continue with the remaining phyllo cups. Brush each phyllo parcel with the remaining melted butter and bake at 350F for 20 minutes, or until the top is golden brown. Let it cool for 5 minutes inside the muffin pan and invert gently without breaking the top of the parcels. serve warm or cold, topped with a little bit of ground pistachios and icing sugar.
Croustillants de Ricotta et Pommes
In Francais Please: Pour 4 Personnes
- 8 feuilles de filo, coupées en deux sur la largeur
- 200g de fromage de ricotta
- 2 c.s de miel (celui que vous preferez)
- ½ c.c de cannelle en poudre
- 1 oeuf
- 1 pomme Pink Lady, épluchée et coupé en des
- 1 c.s de sucre en poudre
- 3 c.s de beurre fondu
- 1 c.s de pistaches en poudre (facultatif0
A l’aide d’un fouet, mélanger la ricotta avec le miel, ¼ c.c de canelle et l’oeuf entier. Mettre de côté. Sur un feu moyen, faites fondre une c.c de beurre et faites sauter les pommes avec le reste de cannelle et le sucre, juqu’à ce qu’elle deviennent légerement dorées sur les bords, envirom 5 minutes.
Beurrer votre moule a muffins et vos feuilles de filo avec le beurre fondu. Laisser-en un peu pour la fin. Garnir chaque portion du moule avec 4 feuilles de filo et les remplir d’une couche de ricotta, puis une couche de pommes, et enfin un peu de pistaches en poudre. Fermer la pate à fillo sur la farce comme si vous fermez un sachet. Beurre la surface du beurre fondu restant. Faites cuire à 160C pendant 20 minutes. Laisser reffroidir 5 minutes dans le moule, puis démouler en faisant attention à ne pas abimer la surface. Servir tiède ou à temperature ambiante, saupoudré de pistaches en poudre et de sucre glace.
Thursday, January 17, 2008
Leeks and gruyère Soufflé, Step-By-Step / Le Soufflé de poireaux et Gruyère, étape par étape
When I was thirteen, I started writing recipes in an agenda that my father had given me. The agenda wasn’t my favorite. When I think about it, I should have chosen a prettier one, a real recipe notebook; yet I’ve decided to go with this one. A small blue agenda with aluminum covered corners and on the cover you can read: “M Roads and Buildings Industry”. I know this M. He’s my father’s friend, a really nice guy. I just didn’t expect his agenda to be the one that would carry my cherished recipes for such a long time, but it did.
My mother’s recipes notebook is also an agenda. A big, black agenda, that goes back to the late seventies, early eighties. I don’t really remember the exact date. What I do remember however is that on the cover you can read: "National’s Oil Company”. I guess it runs in the family!
But when you come to think about it, isn’t cooking making something out of natural resources? That might explain why my mother and I use such agendas as recipes repertoire. Smart thinking, right?
One thing I made yesterday in my kitchen was this Gruyère and Leeks soufflé. It was heavenly delicious: Creamy, light and very comforting. I know a lot of people get scared of soufflés; they have this reputation of being hard to make and don’t like to wait for anybody. But like most reputations, what you hear is not always true.
If you’ve ever whipped up some egg whites or made a mousse, then there is no reason in not making soufflé. This time, I decided to give you a step-by-step recipe in making leeks and Gruyère soufflé. I hope you will enjoy it.
If you have any ideas for step-by-step recipes, let me know. All suggestions are always welcome.
Leeks and Gruyère Soufflé
Recipe: Basic Soufflé recipe from here. Serves 6.
- 4 ½ tbsp sweet butter, plus 1 tsp to coat the
- ¾ cup grated Gruyère cheese
- 3 leeks, cleaned, washed and roughly sliced
- 1 ¼ tsp sea salt
- 4 ½ tbsp flour
- 1 ¼ cup milk
- ¼ tsp freshly ground black pepper
- ½ tsp old style Dijon mustard
- A pinch of freshly ground nutmeg
- 3 egg yolks
- 7 egg whites
Soufflé de Poireaux et Gruyère
In Francais Please: La base du soufflé d'ici. Pour 6 personnes.
- 75 g de farine
- 75 g de Gruyère râpé
- 3 poireaux, néttoyés, laves et grossierement hachés
- 1 ½ c.c de sel marin
- 40g de farine
- 275 ml lait
- ¼ c.c de poivre noir, fraichement moulu
- ½ c.c de moutarde a l’ancienne
- Une petite pincée de noix de muscade, fraichement moulu
- 3 jaunes d’oeufs
- 7 blancs d’oeufs
- Make Ahead: Take the eggs out of the fridge, and let them come at room temperature.
Melt 1 tbsp of butter in a pan and sauté the sliced leeks season with ¼ tsp salt. Cover and cook for 5 min on medium-low heat until the leeks are tender. Uncover and continue cooking for a few minutes on high heat until all the liquid has been evaporated. Set aside to cool.
- Avant Toute Chose: Sortir les oeufs du frigo pour qu’ils reviennent à temperature ambiante. Faire fondre 1 c.c de beurre dans une poele et faites sauter les poireaux. Ajouter du sel et laisser cuire sur feu dou, couvert jusqu'à ce qu’ils deviennent tendres. Découvrir le poele et laisser cuire encore plus, sur grand feu, jusqu’à ce que tout liquide soit evaporé. Mettre de coté.
1- Butter a 1½- quart soufflé mold with 1 tsp soft butter. Be sure it is well coated all around.
Add the Gruyère cheese and turn the mold around so that the cheese sticks to the butter. Let the extra cheese fall into a bowl. Refrigerate the coated mold. A very cold mold helps the soufflé rise straight. Never smear the coating or you mat disturb the rising of the mixture.
1- Beurrer généreusement un moule à soufflé d’1 ½ L avec 1 c.c de beurre mou. Ajouter le Gruyère râpé et faites tourner le moule tout autour afin que le fromage adhere aux parois du moule. Enlever l’exces de fromage mais sans jamais toucher l’interieur du moule ou vous risquerez de deranger la montée du soufflé. Mettre le moule au frais. Un moule bien froid aide le soufflé a monter bien droit.
2- Melt the remaining butter in a saucepan and add the flour. Stir quickly, and cook for 1 minute on low heat.
3- Add the milk, 1 tsp salt, black pepper, the Dijon mustard and bring to a boil, stirring with a whisk. As soon as it reaches the boiling point, the sauce will thicken. Boil on low heat for 1 min, still stirring to avoid scorching.
2- Faites fondre le beurre restant dans une casserole et ajouter la farine d’un seul coup. Mélanger rapidement, et faites cuire sur feu doux pendant 1 minute.
3- Ajouter le lait, sel, poivre, la moutarde de Dijon et porter a ébullition, en remuant constament avec un fouet. Des les premiers bouillonements, la sauce commencera a épaissir. Laisser mijoter sur feu doux pendant une minute, tout en continuant de mélanger.
4- Away from the heat, add the yolks and mix well.
4- Hors du feu, ajouter les jaunes d’oeufs et mélanger.
5- Add the leeks, ground nutmeg and the grated Gruyère cheese. Stir with a wooden spoon.
5- Ajouter les poireaux, la noix de muscade rape et le Gruyère rape. Mélanger a l’aide d’une cuillere en bois.
6- Whip the egg whites until they hold a peak, but are still “wet”. Place about one-third in the leek mixture and mix with a whisk. Work as fast as you can, because as soon as you stop beating the whites, they start to break down and become grainy.
6- Battre les blancs d’oeufs en neige jusqu’a ce qu’ils gagnent de volume mais reste un peu mousseux. Ajouter le tiers a la sauce de poireaux et mélanger avec un fouet. Travailler aussi rapidement que possible car après avoir cesser de battre les blancs, ils ont tendance a se séparer.
7- Using a spatula, gently fold the remaining whites and leeks mixture together.
7- A l’aide d’une maryse, incorporer délicatement les blancs au mélange de poireaux.
8- Fill the soufflé mold to the edges. At this point, the soufflé can be refrigerated, and will keep for at least a couple of hours. At baking time, sprinkle some Gruyere cheese on top and place on a cookie sheet in a 375F-preheated oven. Reduce the heat to 350F and bake for 30-35 minutes (about 25 minutes for individual ramekins). Never open the oven when it’s still baking. Serve immediately.
8- Remplir le moule à soufflé jusqu’aux bords. A ce stade, le soufflé peut etre mis au frais pour quelques heures. Au moment de le cuire, parsemer un peu de gruyère râpé au dessus et faites cuire dans un four préchauffé a 190C. Baisser la temperature a 177C et laisser cuire pendant 30-35 minutes (Environ 25 minutes pour des ramequins). Ne jamais ouvrir le four pendant la cuisson du soufflé. Servir tout de suite.
9- You can also serve your soufflé, especially if it is collapsed, unmolded. Run a knife a round the edges and invert on a plate. Serve in wedges.
9- Vous pouvez aussi choisir de servir le soufflé démoulé (surtout si ce dernier est tombé). Faites passer un couteau autour des bords et démouler. Servir en tranches.
Tuesday, October 16, 2007
Appearances Can Be Deceptive / Les Apparences sont Souvent Trompeuses
Before we get married and before we moved in together, my husband thought I didn’t know how to cook, or as he says in his own words: “ I thought you weren’t that great of a cook”. Nobody told him so, I guess, there was no sign on my forehead saying: “Kitchen Hazard” and I don’t remember him even asking me if I knew how to cook or if I love cooking.
Was it my look? My hands? My age? The way I eat, or may be the way I tilt my head back when I laugh? No! Nothing. He just figured I didn’t cook.
The first dish we had together coming home, after an eight hours flight and jet lagged was an onion and Gruyere omelet. I overcooked the omelet and it wasn’t as moist as I like it but he was stunned, charmed. In other words my omelet proved him wrong: I knew how to cook, sort of.
Since then, my skills in making omelets have improved and he had, hopefully, noticed how lucky he is to have such a talented, not to mention smart and beautiful woman.
He knows by now that as much as I love taking on new challenges and never made before recipes, there are those days when I am much happy with a simple salad, some mashed potatoes or a savory tart.
I saw this tart some weeks ago, and it was one of those recipes that I had to make. You know the feeling, right? You see a photograph that catches your attention. You start to read the recipe and get mesmerized by the combination of the ingredients and how they sound wonderful together. You start dreaming about it day and night and anticipating the flavors in your mouth until you have all the ingredients and decide to make it. I was in love before even making it.
I thought it must be like having a slice of Brie on a slice of bread in one hand and a fresh fig in the other, and popping the whole thing together in your mouth. It must be even better on a tart.
The first night, I served it hot since you can either serve it hot or cold according to the recipe. How do I say this delicately? I didn’t like it hot. I ate it because I was hungry. The figs were still bubbly hot and I couldn’t taste the cheese. You could have used any other cheese instead and I wouldn’t taste it anyway. That’s how strong the flavor of hot figs was. But the crust was delicious.
The second night, still wanting to give it another chance, I served it at room temperature. Reheated just a little bit and let it cooled before serving it. My husband said he liked it better this way. It’s true that the figs being cold, you can have a taste of all the ingredients together but the cheese, even being perfectly ripe, wasn’t as melting as I expected it to be. In fact baking it kind of spoiled it, and I know now that I prefer to have my Brie on a slice of bread.
This tart was not what I thought it would be like, not what I had imagined and looked forward to. Nobody promised me it was going to be an explosion of flavors in my mouth and that I will instantly love it. Was it the tempting picture? My weakness for figs, or my lack of judgment? I don’t know. I just figured it has to be delicious. I guess appearances can be deceptive after all.
Tuesday, September 18, 2007
Worth the Sweat / ça Vaut la Peine de Dégorger
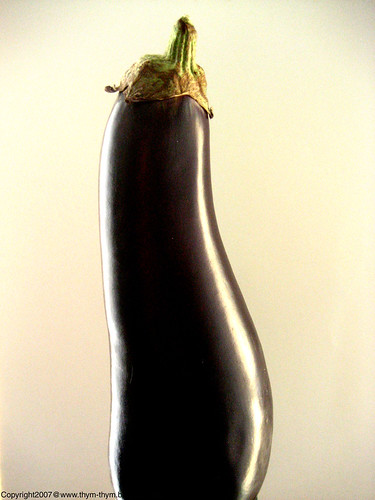
Do you sweat your eggplant?
I used to. When I was still living under my parent’s roof, following my mother’s cooking rules I had always to sweat eggplants before cooking them. “It will absorb less oil if you sweat them,” she would tell me. Then, I moved away, get married and became rebellious against some of what I’ve learned, thinking it was obsolete, a waste of time to sweat my eggplants. I have my own kitchen, my own knifes and pans, no more: “It’s for dessert, don’t touch it!” I can do what I want; eat what I want, when I want.
I don’t fry eggplants; I roast them or broil them so there is no need to sweat them, I would tell my self. Of course I was wrong and my mother was right once again.
Sweating eggplant before cooking it not only helps tenderize the flesh’s texture but also reduces some of its bitter taste. When buying eggplants, choose the one that are firm to the touch with a smooth and shiny skin and no blemishes. And when it comes to the size the smaller the better. Big eggplant tends to be too spongy, bitter and with a tougher outer skin than the small ones. Although now available in markets throughout the years, eggplants are at their very best from August through October when they are in season.
I saw this recipe of ricotta balls on Nicky and Oliver’s gorgeous website and I had to try it right away; especially when I saw that the recipe was taken from Arte, one of my all time favorite TV channels.
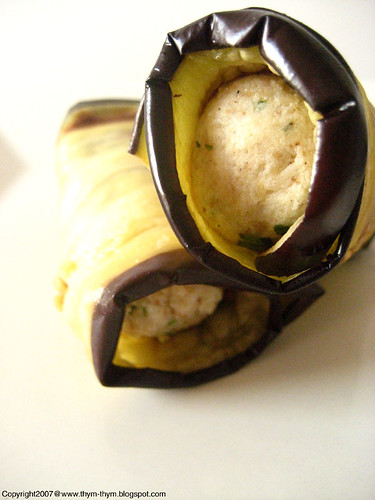
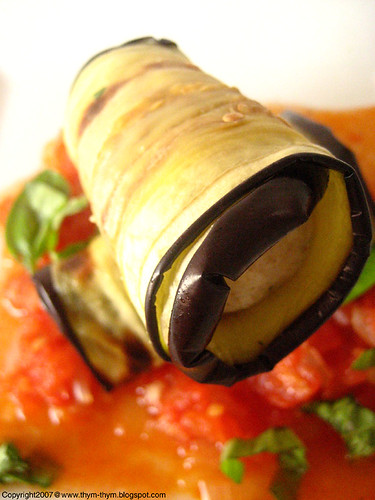
On their website, they served them just as is with the salsa, but I wanted something different, definitely not pasta as it sounded a bit heavy for dinner. So this is how I came up with this vegetarian stuffed eggplant rolls for the enjoyment of my hubby who is a great meat-eater. Actually, even him didn’t miss the meat, as it is a very satisfying, very smooth and melt in your mouth dish. The ricotta stuffing has a texture similar to gnocchi but lighter and fresher, and the eggplant its self has a meaty quality to it and a bite that goes perfectly with the creaminess of the ricotta.
Overall, I would recommend this recipe to anyone who loves eggplant, but also to anyone who is still reticent to eating or cooking with eggplant. It was a very enjoyable dinner indeed, worth the sweating and waiting.
I am taking this recipe to the popular Weekend herb blogging, hosted this week by Myriam.
Stuffed Eggplant Rolls
Recipe:
- 1 eggplant, sliced vertically
- Kosher salt
For the Salsa finta
- 4 tbsp olive oil
- 1 mid-sized onion, finely diced
- 2 tbsp tomato puree
- 21 ounces canned tomatoes, whole or crushed (including juice)
- A generous dash of sugar
- Sea salt (or Kosher salt), freshly ground black pepper
- A handful of fresh basil leaves
For the Polpette di ricotta:
- 9 ounces ricotta
- 1 ½ ounces freshly grated parmesan
- 1 mid-sized egg
- 3 ½ ounces breadcrumbs
- A handful chopped fresh parsley
- Sea salt (or Kosher salt), freshly ground black pepper and nutmeg to taste
- 2-3 tbsp of salsa finta
Sprinkle the sliced eggplant with a very generous amount of kosher salt. Put them over a colander and sweat it from 30 minutes to 1hour and a half, until a brown liquid comes out of the eggplants. Rinse and pat dry the eggplants. Brush each side of eggplants with some olive oil. Broil them or grill them on each side until golden brown. Season with salt and pepper while still hot. Set aside.
For the sauce: In a pan heat the oil. Add onions and sauté until translucent. Add the tomato puree, then the canned tomatoes, crushed. Season the sauce with salt and pepper and the sugar.
Let it cook for 15 minutes and add more salt and pepper if necessary.
For the ricotta balls: Drain the ricotta over a fine-mesh sieve for at least an hour. In a large bowl, put the ricotta with the Parmesan, egg, two or three tbsp of salsa finta and parsley. Add the breadcrumbs gradually until you achieve a consistency that allows you to roll the ricotta into balls. Season with salt and pepper and a pinch of nutmeg. Mix until well incorporated. If the mix is too smooth add more breadcrumbs and if too firm add more salsa finta.
Form into logs and stuff each broiled slice of eggplant with it. Roll the stuffed eggplants and keep them tightly closed with toothpicks, Put them in the pan of salsa finta and let them cook on a low heat for about 10 minutes stirring from time to time to ensure even cooking. Just before serving add the basil leaves.
Roulade d’Aubergine
In francais please:
- Une aubergine, coupee verticalement en lamelles
- Du sel
Pour La Sauce Finta:
- 4 c.s d’huile d’olive
- 1 oignon moyen
- 2 c.s de tomate en conserve
- 600g de tomates pelées et coupée
- Une bonne pincée de sucre
- Sel, poivre fraichement moulu
- Une poignée de basilic
Pour Les boulettes de Ricotta:
- 250g de ricotta
- 40-50g de parmesan fraichement râpé
- 1 oeuf moyen
- 100g de chapelure
- Une poignée de persil, haché
- Du sel, poivre
- 2-3 c.s de sauce finta
Mettre les aubergines dans une passoire. Saupoudrer genereusement de sel et laisser degorger de 30 min jusqu’a 1 heure 30. Rincer les aubergine et bien les secher a l’aide d’une serviette. Badigeonner chaque lamelle d’huile d’olive et griller ou cuire sous le grill du four jusuq’a ce qu’elles deviennent bien dorées. Mettre de coté.
Pour la sauce finta, faites chauffe l’huile d’olive dans une poele. Ajouter les oignons et laisser cuire jusqu’a ce qu’il deviennent transluscides. Ajouter la tomate en conserve, les tomates coupée en dés, sel, poivre et le sucre. Laisser cuire 15 min et assaisonner plus si necessaire.
Pour les boulettes de ricotta, mettre le fromage de ricotta dans une étamine et laisser égoutter pendant une heure. Dans une jatte, mettre la ricotta, le parmesan, l’oeuf, deux ou trios c.s de sauce finta et le persil haché. Ajouter la chapelure petit a petit jusqu’a ce que vous puissiez faire des boulettes du mélange. Sel, poivre et une pincée de noix de muscade. Mélanger bien. Si le mélange est trop liquide ajouter le reste de chapelure, si il est trop sec ajouter plus de sauce finta.
De ce mélange de ricotta, faire des petits boudins que vous mettrez au milieu de chauqe lamellas d’aubergines. Rouler les aubergines et fermer avec des cure-dents. Mettre les roulades d’aubergine dans la sauce finta et laisser cuire encore 10 min, en tournant de temps en temps pour que la cuisson de la ricotta soit uniforme. Ajouter le basilic juste avant de servir.
Wednesday, August 22, 2007
A Family Affair / Une affaire de famille
When the weather is hot and the air is humid that it makes my hands sweat and my feet puff out, the stove becomes my worst enemy and the oven, my bête noire. I avoid all temptations that might tickle my papilla. I turn off the TV and the laptop. I put away all food magazines, and restrain my self from reorganizing for the umpteenth time my cookbooks and recipe folders. I lunch on salads and fruits and brag about how I lost some more pounds.
But when I can say, at least for most of the time, that I do restrain my self from eating too much; I wouldn’t say the same for cooking. And how can you do so when you were raised in a house where any event, and I mean any event, involves pans shaking, vegetables waltzing, bread mopping and a minimum of 15 people gathered around the table. As if it wasn’t enough to have the cooking syndrome in my genes, I married a man that smells, feels and guesses what is on the menu the minute he crosses the entry door. He gets as much excited as I do about a new recipe and some gorgeous vegetables at the market. And he always has the nice word that I like to hear at the end of the meal: “Thank you Honey! It was delicious". He is my kind of gourmand.
Every time I spot a new recipe, adrenaline rushes inside my body making my eyes popping out of my head and my mouth water. I become amnesic as I instantly forget about all what I was doing at that exact moment and runs to the kitchen to start my experimentations.
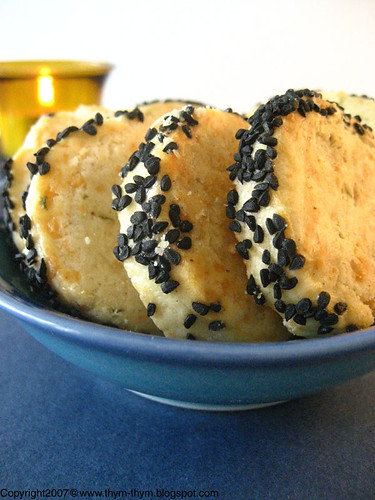
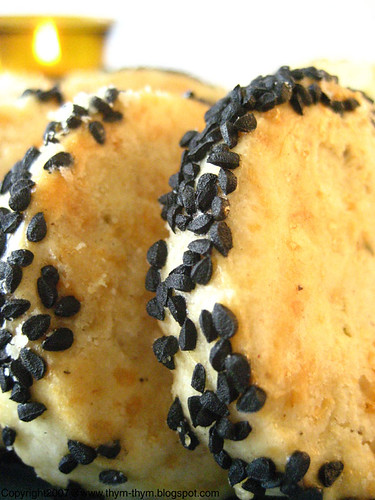
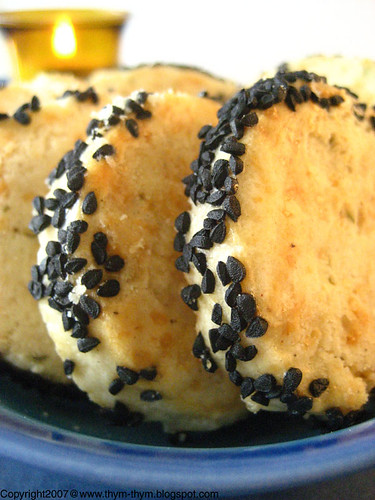
Ina Garten in one of her episodes made these Crackers using Parmesan and Black pepper. These crackers have more body than your usual crackers. They are very similar to shortbreads, crumbly and melt in you mouth. Her recipe calls to use one teaspon of thyme, which after baking won’t look enough. The thyme gets lost between the bolder flavor of both Parmesan and black pepper. You can use fresh thyme but I am guessing dried thyme or any other herb would work as well. I added to the crackers nigella seeds to add more crunchiness and as it bake the nigella seeds gives its smokiness that I just love. I generally use nigella seeds as a topping on my bread but I must say that this is another way where I will be using it.
This is a very versatile recipe that you can twist and personalize as much as your inspiration goes. Because when it comes to cooking or baking, there are no rules, and certainly not the weather, that can stand against your passion and your genes.
Parmesan Black Pepper Crackers
Recipe: adapted from Barefoot Contessa. Yields about 30 crackers
- 1/4 pound (1 stick) unsalted butter, at room temperature
- 3 ounces freshly grated Parmesan
- 1 1/4 cups all-purpose flour
- 1/4 teaspoon kosher salt
- 1 tbsp chopped fresh thyme leaves
- 1/2 teaspoon freshly ground black pepper
- 2 tbsp Nigella seeds
- 1 egg white, lightly beaten
In a bowl, mix the butter until creamy. Add the Parmesan, flour, salt, thyme and black pepper and mix to combine. The dough will be sticky and very soft. Put the dough into a floured surface and shape it into a 13- inch long log.
Wrap the dough and freeze it for 30min or until needed. You will still be able to slice it.
Using a sharp knife or an electric knife, slice the log into ½ inch thick discs. Spread the nigella seeds in a plate and roll the border of each cracker, first in the egg white then in the nigella seeds. Arrange the crackers on a sheet pan, lined with parchment paper. Bake at 350F oven for about 20min or until the edges start to brown.
Serve with a platter of cheese and grapes.
Biscuits Salés aux Parmesan et Poivre Noir
In francais please: Adaptee de Barefoot Contessa. Pour 30 biscuits
- 113g de beurre, a temperature ambiante
- 85g de parmesan fraichement rape
- 300ml de farine
- ¼ c.c de sel
- 1 c.s de feuilles de thym
- ½ c.c de poivre noir fraichement moulu
- 2 c.s de graines de nigelle
- 1 blanc d’oeuf, legerement battu
Dans un bol, melanger le beurre mou jusqu’a ce qu’il devienne vremeux. Ajouter le parmesan, le sel, farine, poivre noir et thym. Melanger jusqu’a obtention d’une pate mollle et collante. Transvaser la pate vers une surface legerement farinee et former en boudin d’une longeur de 33cm.
Envelloper la pate dans un film plastique et mettre au congelateur pendant 30min oujusqu’a ce que vous en aurez besoin. La pate ne se congelera as completement tant que vous l’utiliser le jour meme. A l’aide d’un couteau bien eguise ou d’un couteau elecrtique, couper le boudin en discs d’un centimetre et demi d’epaisseur. Mettre les graines de nigelles dans une assiette et rouler les bords de chaque biscuit, premierement dans l’oeuf battu puis dans les graines de nigelle. Arranger les biscuits dans un grand plateau, garni de papier fulfurise. Faites cuire dans un four prechauffe a 180C pendant 20 min ou jusqu’a ce que les bords des biscuits deviennent legerement dores.
Ces biscuits s’accompagnent parfaitement avec un plateau de fromage et des fruits.
Friday, May 18, 2007
Moi et Ma Feta / Me and My Feta

Every two or three weeks it’s the same ritual. I go to the market to buy some feta: arrive at the deli, take my number and wait.
Thirty-six!
Yes, right here!
How can I help you?
I would like some Bulgarian feta, please
How much?
Hmmm! One pound
…
Anything else?
No, that’s it. Thank you.
You’re welcome. Have a great day!
Thanks, you too
…
Thirty-nine!
I then go back home and ask my self: “Why did I buy it again?”
I will probably start making some salad, usually a Greek salad with some feta on top or for a change I will use it with orzo pasta and shrimp or in a savory tart with some herbs and vegetables. But, as much as I love feta cheese and as much as my inspiration goes I just get bored sometimes with this same plain feta taste that I get again and again. Whether I use it to compliment a salad or a savory dish, it always leaves this same salty, goat cheese taste in my mouth.
By the time I finish my pound of feta, part of it would go bad spending most of its time lonely in the fridge.
A few weeks later, it’s back again.
Market. Deli.
Fifty-two!
Help you?
Feta. Please.
…else?
No. Thanks.
Good day!
You too.
Go back. Think. Salad? Quiche? Salad? Fridge? Bad!
Same old, same old.
Bo-ring!
Then one day it happened. The magic of the Internet and hours spent browsing other people food blogs have finally paid off.
I have found the solution. Or the solution has found me? Anyway, we have found each other at Haalo’s blog. If you don’t know Haalo yet, which I doubt, then you should take a glimpse at her original recipes and mouthwatering pictures. In her post she marinated the feta cheese with a variety of herbs and some “good olive oil” and then store it in the fridge for days to let the flavor develop.
I basically did the same except for the use of some herbs and some lemon zest in mine. I used Bulgarian feta cheese but you can use whatever feta cheese you like. If you like the taste of goat cheese then you won’t be disappointed with Bulgarian feta. My only advice, and it is my personal experience, is to avoid cow’s milk feta cheese because the best feta is the one made with sheep or goat milk. The recipe doesn’t have the exact amount of herbs because, again it is everyone taste whether you like to add some herbs more than others. Feel free to experiment with this versatile marinade and to use it in salads or just as a dip with a slice of your favorite bread. I know my next trip to the deli will be more exciting this time because I know exactly what I am going to do with my flavorful feta.

Marinated Feta:
Recipe:
- 1 pound of Bulgarian feta
- Parsley
- Chives
- Mint
- Rosemary
- Garlic
- Coriander seeds
- Fresh chili, finely diced
- 2 zest strips of a lemon
- Ground black pepper
- Good extra virgin olive oil
Pat the pound of feta dry on a paper towel. Carefully dice it in small cubes and place it in a bowl with the chili, the coriander seeds and the lemon zests. Chop the herbs and the garlic and add them to the bowl of feta. Toss gently with your fingers to avoid crumbling the cheese. Season with freshly ground pepper and toss again. Put it in a jar and add the olive oil until it all covers the feta. Seal and refrigerate. Prior to use it, put the jar of feta at room temperature until the olive oil is liquid again.

Feta Marinee:
In francais please:
- 500g de feta bulgarienne
- Persil
- Ciboulette
- Menthe
- Romarin
- Ail
- Graines de coriandre
- Piment rouge, Cisele
- 2 zest d’un citron
- Poivre noir
- De l’huile d’olive de bonne qualite
Avant toute chose, Faites secher votre feta delicatement avec du papier et la couper en petits des. Mettre la feta dans un bol avec le piment rouge, les graines de coriander et le zest de citron. Hacher les herbes et l’ail finement et les ajouter au bol de feta. Melanger delicatement en utilisant vos doigts. Assaisoner avec le poivre et melanger encore. Mettre dans un bocale a fermeture hermetique et recouvrir completement d’huile d’olive. Mettre au frais pendant des jours avant de le consomer. Avant de le deguster, Sortir votre bocal de feta et laisser-le a temperature ambiante jusqu’a ce que l’huile d’olive redevienne liquide.

