Showing posts with label Breakfast. Show all posts

Monday, October 24, 2011

Algerian Pastries in Ann Arbor

Makroud


Three months ago, I decided to take the plunge and follow one of my dearest dreams. That week, butter, flour and orange blossom water spent most of the day on the countertop and my hands were rolling, shaping and filling pastries almost every single day. That week, Wednesday came faster than ever before and I’ve found myself one Wednesday afternoon packing my car with a table, a chair, a cardboard sign and a bin filled with pastries. With a kiss on the forehead from my husband and a hug goodbye from my daughter Layla, I backed up on the driveway and took the road that would get me closer to the Ann Arbor farmer’s market, to my dream; the road that would give birth to Al Meida fine Algerian pastries. That day, I gave birth to a slice of my country in the heart of Ann Arbor and it never felt so beautiful, so sweet, just like pastries.


Wednesday, April 9, 2008

Easy, Moist, Light, Delicious and Moist / Facile, Moelleux, Léger, Délicieux et Moelleux

Banana Cake for Breakfast


Ah! Banana cake! The word alone reminds you of slow weekends, family picnics and afternoons sitting by the window listening to the drip, drop of the rain while sipping a warm cup of tea.
To me, banana cake doesn’t ring a bell to my childhood memories, but bananas! Oh, yes.

Growing up, in the beginning of the 90’s in Algeria, it wouldn’t even cross my mind to put mashed bananas in a cake. It wouldn’t even cross my mind to let bananas go untouched and abandoned for days on the counter top. It wasn’t that we were that found of bananas, it was because we hardly ever see it in our kitchen. You see, bananas were to us what watermelons were to Japan: Expensive. They were so expensive and dear that eating them outside was considered an insult to those who can’t afford it.
Bananas were a “luxury” fruit. The one you see meticulously displayed in brown rattan baskets, along with pineapples, litchis and other exotic, unknown fruits at gourmet stores (we call these type of stores in our slang: pharmacist. I don’t know how this word came to be used that way, but we use it for all shops that are outrageously pricey. And we use it for the pharmacist as well. Got it?).

Bananas were to be bought on special events, on special days. My mother would buy it for us when she wanted it to spoil us, when we had good reports at school, when we had a birthday to celebrate, when they were on sale, which rarely happened. And when these days took place, my mother would cut the banana in half, hide it behind her back and ask us to choose. Otherwise, we would be measuring and studying the banana from all corners to see which half is bigger. Eating whole bananas were exceptional. But even with half a banana, we were happy, appreciating and extending seconds to minutes of lavish pleasure. (A funny story to show you the status of bananas at that time: I remember a distant cousin who went to live in France. After a few months there, he sent a picture to his parents of him near his refrigerator wide open, holding a bunch of bananas in his hand. How did I see this picture? His mother would carry the photo with her and show it to anyone asking after her son.)

Years went by, and now bananas went from rattan baskets at gourmet shops to donkeys pulling carts packed with bananas at the market. Even at rural markets. Bananas were cheap, even cheaper than potatoes at some point. We made banana tarts, banana mousse, banana papillotes with vanilla beans; we even tried banana tagine, which was quite good.
After some experiments, some misadventures and abandoned bananas on the counter top I came to the conclusion that I wasn’t found of bananas, but I love banana cake/bread.

I came across this recipe a while ago while browsing my usual blog reads. It appealed to me more than the others banana bread because it didn’t require the use of much ingredients and fatty calories. I know what you’re thinking about “healthy” cakes, and I feel the same way, but trust me, and trust David, this isn’t your typical dry, tasteless cake. This, my friends is the best banana cake I have ever had. I know I can exaggerate sometimes, especially when it involves baked goodies, but not today. Not only it is very easy to make and low in calories, which is always a plus for my hips, but it’s also moist, light, fragrant, delicious and moist. I know I said moist twice, but this is just how moist this cake is. David Lebovitz, who is a very talented pastry chef and a very funny Parisian, uses a combination of banana and cocoa nibs. Instead, I used banana and fresh Algerian dates, which was heavenly good. Why have I never thought about this combination before? Oh, yes! The pharmacists!


Banana Cake


Banana and Dates Cake

You can use a mixture of all purpose flour and white whole-wheat flour, or just use the all-purpose one. Adding dates and orange zest to the batter was a personal choice, as I love the combination of both. You can fellow David’s delicious Directions by using chocolate chips or cocoa nibs instead of dates, and cinnamon instead of orange zest.

Recipe: Adapted from
here
- 1 cup (120 g) all purpose flour
- ½ cup (90g) white whole-wheat flour
- 1-teaspoon baking powder
- ½ teaspoon baking soda
- ½ teaspoon salt
- 1 teaspoon Orange zest
- ¾ cup (150 g) sugar
- 2 tablespoons (55 g) melted butter (salted or unsalted)
- 1 large egg white
- 1 large egg, at room temperature
- 1 cup (250 ml) banana puree, made from about 2 very ripe medium-sized bananas
- ½ cup (125 ml) plain yogurt, regular or low-fat (I used regular yogurt, but you can use sour cream as well)
- ½ teaspoon vanilla extract
- 1/3 cup (60 g) Dates, pitted and diced

Butter a 9-inch (23 cm) square pan or a loaf pan and line the bottom with a sheet of parchment paper. Preheat the oven to 350F (180 C).
- Sift together in a bowl the flour, baking powder, baking soda, and salt. Mix in the sugar.

- In a large bowl, mix together the butter, egg white, egg, banana puree, sour cream, vanilla and orange zest, if using.

- Make a well in the center of the flour mixture and stir in the wet ingredients with a spatula until almost mixed. Add in the dates and stir until just combined, but don't over stir: stop when any traces of flour disappear.

- Scrape the mixture into the prepared pan and bake for 40 minutes, or until the center feels lightly springy and just done, and a toothpick inserted inside the cake comes out clean.

- Cool on a baking rack.

Storage: This cake will keep well for 3-4 days, or can be frozen, wrapped in plastic wrap, for a few months.

Cake à la Banane et Dattes

Vous pouvez utiliser un mélange de farine complete et farine blanche, ou utiliser seulement la farine blanche. Le choix de dattes et le zeste d’orange était purement personnel, car j’adore la combination des deux. Les dattes peuvent etre remplacé par de pépites de chocolat et le zeste d’orange par de la canelle.

In Francais Please: adapté d’ici
- 120g de farine
- 90g de farine blanche complete
- 1 c.c de levure chimique
- ½ c.c de bicarbonate de soude
- ½ c.c de sel
- 1 c.c de zeste d’orange
- 150g de sucre
- 55g de beurre, fondu (salé ou doux)
- 1 gors blanc d’oeuf
- 1 gros oeuf
- 250ml de purée de banane
- 125ml de yaourt nature (entier ou allégé)
- ½ c.c d’extrait de vanille
- 60g de dattes, dénoyautées et coupées en dés

Beurrer un moule carré de 23cm de diametre ou un moule à cake et garnir le fond d’un papier-parchemin. Préchuaffe le four a 180 C.
- Tamiser les farines, la levure, bicarbonate de soude, et le sel. Ajouter le sucre.

- Dans un grand bol, mélanger le beurre, le blanc d’oeuf, l’oeuf, la purée de banane, le yaourt, la vanille et le zeste d’orange.

- Faire un puits au milieu de la farine et verser dedans le mélange precedent en utilisant une maryse jusqu’à ce que le tout soit presque uniforme. Ajouter le dattes et mélanger juste ce qu’il faut pour bien les dispercer, mais ne pas trop mélanger: arrêter-vous quand toute trace de farine ait disparu.

- Verser la pâte dans votre moule beurré et faire cuire pendant 40 minutes, ou jusqu’à ce que le centre semble cuit et qu’un cure-dents en ressort propre.

- Laisser refroidir sur une grille à patisserie sans le démouler

Ce cake se garde bien pendant 3-4 jours, ou peut être congelé, enveloppé dans un film plastique pendant quelques mois.

Tuesday, March 18, 2008

Orange, Cinnamon and Raisins Sweet Rolls, with Orange Butter/ Petits Pains à L’Orange, Cannelle et Raisins secs, et son Beurre à L’Orange

Fresh from the Oven


It rains in my heart
As it rains on the city;
What is this langor
That permeates my heart?

Il pleure dans mon coeur
Comme il pleut sur la ville;
Quelle est cette langueur
Qui pénètre mon coeur?

Paul Verlaine, Romances sans paroles (1874)

My friends! Forgive my lack of words lately.

I haven’t been posting as often as I should, and I feel bad about it. As much as I love you guys. As much as I adore sharing my kitchen adventures, my laughs, my past and future with you, I felt a need to take a break. To sit down and breathe.

My heart felt empty these past few days. My heart felt hollow. But I promise, it’s not as bad as it seems, and I am not a big whiner, I swear. As my nana would have said: “ Flush your whining down the toilet…you can be sure it won’t come back!” She was a philosopher in her own way.

I still need some time, to clear up my mind from various old dusts. I still need to borrow my husband’s shoulder to rest on, and a soft pillow to sleep on, but I will be OK! I’ll be fine! The weather isn’t helping either… and this song too.

Next time will be more joyful. I promise! In the meantime, I brought you my cinnamon and orange scented soft pillows to share with you. My heart was growing bigger and stronger as these little buttery rolls were baking, filling my house with a warm cinnamon and yeasty scent.

My heart was happy.

Better with Orange Butter


Orange, Cinnamon and Raisins Sweet Rolls, with Orange Butter

Recipe: Adapted from Gourmet, November 2005. For 12 sweet rolls
- 3 tablespoons warm water plus 2 teaspoons water at room temperature
- 1 package active dry yeast (2 ¼ teaspoons)
- ½ cup plus 1 teaspoon sugar
- 5 to 5 ½ cups unbleached all-purpose flour
- 1 tablespoon finely grated fresh orange zest
- 2 teaspoons salt
- 1 teaspoon cinnamon
- ½ cup raisins (steamed)
- - 1 teaspoon anise seeds (optional)
- 1 cup warm milk
- 1 ½ teaspoons vanilla
- ¾ stick (6 tablespoons) unsalted butter, softened, plus additional for greasing bowl
- 4 large eggs at room temperature
- - For the Orange Butter:
- 1 stick (½ cup) salted or unsalted butter, softened (I used salted butter)
- 1/3 cup orange marmalade


1-Stir together warm water, yeast, and 1 teaspoon sugar in bowl of mixer fitted with paddle attachment and let stand until foamy, about 5 minutes. (If mixture doesn't foam, discard and start over with new yeast.) While yeast is foaming, whisk 4 cups flour with zest, salt, raisins, anise seeds (if using) and cinnamon in a bowl.

2-Add milk, vanilla, butter, and remaining ½ cup sugar to yeast, then mix at medium speed until combined. Beat in 3 eggs, 1 at a time, then add orange cinnamon flour and mix until combined well.

3-Replace paddle attachment with dough hook attachment and mix at medium-low speed, adding more flour (1 to 1 1/2 cups), 1/4 cup at a time, until a smooth but slightly sticky dough forms, about 5 minutes. Transfer dough to a work surface and knead by hand until smooth and elastic (dough will remain slightly sticky), about 3 minutes. (I used only an additional 1cup of the flour. The dough will look sticky, but once kneaded (as shown in this life changing video) it will regain a smooth texture)

4- Form dough into a ball and transfer to a large buttered bowl, turning dough to coat with butter.
Cover bowl with kitchen towel and let dough rise in a draft-free place at warm room temperature until doubled in bulk, 1 1/2 to 2 hours.

5- Line a 17- by 14-inch baking sheet with parchment paper.
Turn out dough gently, without ripping it off the bowl, onto work surface and fold it over. Cut dough into 12 equal pieces. Cup your hand over 1 piece and, using your thumb and pinkie to keep ball inside your cupped hand, push dough lightly with heel of your hand against work surface while rolling in a circular motion to form a smooth ball. Repeat with remaining pieces of dough, arranging balls 1 inch apart on baking sheet.

6- Cover loosely with kitchen towel and let dough rise in a draft-free place at warm room temperature until doubled in bulk, 1 to 1 1/4 hours. Put oven rack in middle position and preheat oven to 400°F.
Whisk together remaining egg with remaining 2 teaspoons water in a small bowl. Cut a 1-inch X (1/4 inch deep) in top of each roll with kitchen scissors. Brush rolls lightly with egg wash and bake until golden and rolls sound hollow when tapped on bottom, 15 to 20 minutes. Brush them with a simple sugar syrup (to have this shiny finish, but it's optional). Transfer rolls to a rack and cool, at least 20 minutes. Serve with the Orange Butter.
7- To make the orange butter:
Pulse butter and marmalade in a food processor, a mixer, or simply by using a fork until combined well. Transfer to a small crock or serving bowl. Butter can be made 5 days ahead and chilled, covered. Bring to room temperature before serving.

- Note:
Rolls can be baked 1 day ahead and cooled completely, then kept in sealed plastic bags or a large airtight container at room temperature. (I prefer them on the following day) You can reheat them on a baking sheet in a 350°F oven 10 minutes.

Orange, Cinnamon and Raisins Sweet Rolls


Petits Pains à L’Orange, Cannelle et Raisins secs, et son Beurre à L’Orange

In Francais Please: Adaptée de Gourmet, Novembre 2005. Pour 12 Petits pains
- 3 c.s d’eai tiede plus 2 c.c d’eau a temperature ambiante
- 1 sachet de levure bloulangere (2 ¼ c.c)
- 50g de sucre en poudre plus 1 c.c
- 600 a 780g de farine
- 1 c.s de zeste d’orange
- 2 c.c de sel
- 1 c.c de cannelle en poudre
- 100g de raisins secs (cuits a la vapeur)
- 1 c.c de graines d’anis (facultatives)
- 225 ml de lait entier tiede
- 1 ½ c.c de vanille
- 90g de beurre mou, plus une noisette pour beurre le bol
- 4 gros oeufs à temperature ambiante
- Pour le Beurre à l’Orange:
- 115g de beurre salé ou doux (J’ai utilisé le salé)
- 50g de marmelade d’orange


1- Mélanger la levure, le sucre et l’eau tiede dans le bol d’un mixer et laisser mouser environ 5 minutes. Entre temps, mélanger 480g de farine avec le sel, canelle, raisins secs, zest d’orange et graines d’anis (si vous en utilisez)

2- Ajouter le lait, beurre et les 50g de sucre a la levure, puis bien mélanger. Ajouter 3 oeufs, un à un, puis ajouter le mélange de farine et battre encore jusqu’ à ce que tout soit homogene.

3- Si vous utiliser un kitchen aid, mettre l’attachement pour le pain et petrir la pate en ajoutant le reste de la farine petit à petit (120g a 180g), jusqu’à ce que la pate devienne reguliere et un peu collante, environ 5 min. Transvaser la pate vers votre plan de travail et petrir encore pour que la pate devienne elastique (la pate restera plus au moins collante), environ 3 min. (Pour ma part, je n’ai ajouté que 120g de farine. La pate vous semblera tres collante mais une fois travaillée (voir video), elle sera plus homogene).

4- Rouler la pate en boule et la mettre dans un bol beurré. Couvrir d’un film plastique ou un torchon et laisser lever 1 ½ à 2 heures.

5- Garnir une tole a patisserie d’un papier-parchement.
Verser la pate doucement sans tirer dessus sur votre plan de travail et la plier en deux. Former un doudin et couper 12 petites boules de la pate. Former des boules et les mettre sur la tole a patisserie. Les espacer de 3 cemtimeres environ.

6- Couvrir d’une serviette et laisser lever 1- 1 ¼ heures. Préchauffer le four à 200C. Mélanger l’eau avec l’oeuf restant et badigeonner les petits pain avec. Faites cuire jusqu’à ce qu’ils deviennent dorés et semblent creux quand vous taper doucement la base, environ 15-20 minutes. Badigonner d'un syrop au sucre pour avoir ce fini brillant, mais c'est facultatif). Laisser refroidir sur une grille à patisserie au moins 20 minutes avant de servir

7- Pour le Beurre à l’Orange: Mélanger le beurre mou et la marmelade dans un robot ménager, un mixer ou simplement à l’aide d’une fourchette. Mettre dans une assiette ou un petit ramequin et servir avec les petits pains. Ce beurre peut etre prepare 5 jours avant, couvert d’un film plastique et mis au frais. Ramener à temperature ambiante avant de servir.

- Note:
Les petits pains peuvent etre cuit un jour avant, refroidit completement et conserve dans un sachet ou une boite à fermeture hermétique, à temperature ambiante. (je le préfere le lendemain de sa cuisson) Vous pouvez aussi les réchauffer pendant 10 minutes à 160C et les servir tiede avec le beurre à l’orange.


Friday, February 1, 2008

Vote and Win A trip to Napa / Voter et Gagner un Voyage a Napa

Pain Perdu


My dear readers, I need your voices.

By now, you must have heard about the Death By Chocolate Contest organized by Culinate, where everyone is invited to vote for his or her favorite blog post about chocolate. The Grand Prize for this contest will be a trip for two to the gorgeous Napa to attend the Copia center’s “Death By Chocolate” Festival on February 28, 2008.

The best part about this contest is that you don’t have to be a food blogger to have a chance to win. You heard me right: Just by voting for you favorite food blogger, in this case me, you will have a chance to win a trip for two to Napa as well.
The winner among readers will be chosen at random from all entries.

I have submitted my all time favorites: Jacques Pépin’s Chocolate Truffles Trio. I hope you enjoyed them as much as I did sharing them with you.
Although there are some great chocolate entries out there, I am going to shamelessly ask you to please vote for me. The top ten vote-getting blog posts will move on the final round, where the winner will be chosen by an esteemed panel of culinary and chocolate experts.

Please, make this be a birthday present before my birthday (which actually is two months and seventeen days away). You will not only make one of my dreams come true, but also get yourself a chance to win a trip to Napa along the way.

You can register now for your chance to win then come back Monday, February 4 to vote, which will increase your chance to win. On the right column of my blog, there is a direct link (the Death by chocolate Logo) that will take you immediately to where you can vote for me. Voting will conclude February 8 and the winners will be announced February 9.

Good luck to all of you and don’t forget to come back Monday to vote. Your voices mean a lot to me!

Thank you so much!


Now we shall go back to the kitchen with this simple and delicious Almond crusted French Toasts that I made this morning for breakfast. The almonds browned in butter bring a nutty crunch to the French toast. If you have one of those nuts oil by La Tourangelle, I used the roasted walnuts oil, by all means use a bit of it with the butter. They really enhance the nuttiness of the finished toast. The best part about the recipe, besides being easy peasy, is that you can prepare the batter the night before and make your French Toasts in the morning. You can either dredge both sides in almonds or just one side, like I did. I used some leftover orange and fennel seeds Challah bread, but plain Challah, Brioche or even slices of Baguette are good substitutions.

These will give a note of sophistication and warmth to your breakfast but without the huff and puff of the usual sophisticated breakfast. I hope you will make them and enjoy them as much as we did.

Happy Weekend Everybody!


French Toast


Almond Crusted French Toast

Recipe: Gourmet, May 2006. Serves 4
- 4 large eggs
- 1 1/3 cups half-and-half
- 4 teaspoons sugar
- 1/2 teaspoon vanilla
- 1/8 teaspoon salt
- 1 1/4 cups sliced almonds (5 oz)
- 8 (3/4-inch-thick) slices Brioche or Challah or Baguette
- - 3 tablespoons unsalted butter
- 1 tablespoon Almond or Walnut oil (optional)
- Confectioners sugar

Put oven rack in middle position and preheat oven to 275°F.

Whisk together eggs, half-and-half, sugar, vanilla, and salt in a large shallow dish until combined well. Spread almonds on a large plate. Soak 4 slices of bread in egg mixture, turning over once, until saturated. Working with 1 slice at a time, remove bread, letting excess egg mixture drip off, then dredge in almonds to coat both sides, gently pressing to help adhere. Transfer to a plate or wax paper. Repeat procedure with remaining 4 slices.

Heat 1 1/2 tablespoons butter and 1 tbsp walnut oil in a 12-inch heavy skillet over moderate heat until foam subsides, then cook 4 bread slices, turning over once, until almonds and bread are golden brown, 5 to 6 minutes. Add remaining 1 1/2 tablespoons butter and cook remaining 4 slices in same manner. Transfer French toast to a baking sheet as cooked and keep warm in oven.

Serve with some confectioners sugar dusted on top.


Almonds French Toast


Pain Perdu aux Amandes

In Francais Please: Gourmet, Mai 2006. Pour 4 personnes
- 4 gros oeufs
- 325 ml de moitié lait, moitié crème
- 4 c.c de sucre en poudre
- 1/8 c.c de sel
- 100g d’amandes effilées
- 8 tranches de Brioche ou Challah ou Baguette
- 3 c.s de beurre
- 1 c.s d’huile d’amandes ou de noix (facultative)
- Sucre glace pour servir

Mettre votre grille du four au milieu et préchauffer a 135C.

Dans un grand bol, battre les oeufs, lait, crème, sucre, vanille, et sel. Mettre les amandes effilées sur une assiette. Faites tremper chaque tranche de pain des deux côtés. Laisser bien égoutter l’excès de liquide et presser chaque coté sur les amandes. Continuer avec le reste.

Faites chauffer 1 ½ c.s de beurre dans une poele assez large et faites frire les tranches de pain, de chaque côté et sans trop encombrer la poele, jusqu’à ce que le pain et les manades soientbien dorés, environ 5 a 6 minutes. Ajouter le beurre restant et continuer avec les reste des tranches. Servir tout de suite ou mettre au four au fur et mesure pour les tenir au chaud.

Tuesday, January 15, 2008

The Best Granola

Granola


It always raises a certain level of high expectations when a recipe calls itself “The Best”. While this granola recipe may seem as any other granola you may find on the web or a cookbook, it is, at least in my opinion, the Best granola I’ve tested so far.

After more than a year, eleven failed granola recipes, and half an hour harassing a local baker about her secret to the perfect granola, I have finally found the one that I can call my favorite. My vision of the perfect Granola was that it had to be crunchy, all natural (no hidden corn syrup), not boring, not too crumbly and not too sweet.

This one is all what I was looking for. It is crunchy, with the right amount of sweetness and pleasantly spiced with cinnamon, cardamom and vanilla. There was really nothing to change to the original recipe, but being the inquiring person that I am, I still wanted to experience different possibilities, additions and subtractions to make it my own:

- The recipe calls for a mixture of quick oats and oats flour. I tried it with oats flour, ray flour; buckwheat flour and white whole-wheat flour and I always had better results and texture with the last one. I also subtracted half the amount of flour from the original recipe.

- The addition of nuts is purely personal. I like to put in mine 2 cups of nuts (walnuts and hazelnuts in this one) with ½ cup of unsweetened coconut flakes, for the aroma and taste, and ½ cup of flaxseeds for their subtle nutty flavor and abundance of omega-3 fatty acids.

- Finally I didn’t use mace simply because I couldn’t find it, plus I’ve never had it before.

So here it is! My Favorite Granola in the whole wide world. I hope you will enjoy it as much as I do, every morning.


Happy Birthday, Papa!


Granola2


My Favorite Granola

Recipe: Adapted from here
- ½ lb quick oats
- ¼ lb white whole wheat flour
- 2 oz unsweetened shredded coconut
- 2 oz flaxseeds
- 7 oz of coarsely chopped nuts (I use walnuts with almonds or with hazelnuts but you can use whatever you like)
- 1 cup, packed dark brown sugar
- 1 stick unsalted butter
- 1/3 cup water
- ½ tsp sea salt
- 1 tsp vanilla extract
- ½ tsp cinnamon
- ½ tsp ground cardamom

Preheat your oven at 300F. In a large mixing bowl, combine the oats, flour, flax seeds, coconut and nuts. Set aside. In a saucepan over medium heat, combine the brown sugar, butter and water and heat until the butter has melted and the mixture is bubbly. Using a wooden spoon, stir the mixture together until smooth, and then stir in the salt, vanilla and spices. Pour the mixture over the oats mixture and stir well to coat (Doing this with your hands is much better). Let stand for about 10 minutes.

Spread the mixture on a large baking sheet, separating it into irregular clumps with your fingers, and allowing space between the clumps for the hot air to circulate. Slide it into the middle of the oven and bake until the top is golden brown, about 15 minutes. Remove from the oven and stir to break up the mixture into medium sized clumps. Return to the oven and bake again for another 15 minutes before stirring again. Bake for another 15 minutes or until the granola is a uniform golden brown and completely dry; this usually takes me about 30-45 minutes from the beginning of baking to finish. Cool completely on a wire rack (out of reach from your companion) before using.

Store in an airtight container at room temperature. Serve as desired.


Granola1


Mes Granolas Préférés

In Francais please: Adaptée d’ici
- 250g de flocons d’avoine
- 100g de farine blanche complete
- 50g de graines de lin
- 50g de noix de coco non-sucrée
- 200g de fruits secs de votre choix, grossierement hachés (noix, amandes, noisettes, noix de pecan)
- 115g de beurre
- 200g de sucre brun
- 60ml eau
- ½ c.c de sel marin
- 1 c.c d’extrait de vanille
- ½ c.c de canelle
- ½ c.c de cardamome en poudre

Préchauffer le four a 150C. Dans une jatte profonds, mettre les flacons d’avoine, la farine, les fruits secs, la noix de coco et les graines de lin. Metrre de côté. D’autre part, dans une petite casserole, mettre le sucre, le beurre et l’eau. Mettre sur feu doux et laisser cuire jusqu’à ce que le beurre fonde et que le mélange commence à bouillonner. Mélanger a l’aide d’une cuillere en bois et ajouter sel, vanille et épices et mélanger encore. Verser le mélange de beurre sur les ingredients secs et mélanger (utiliser vos mains pour cette étape, c’est plus efficace). Laisser de côté pendant 10 minutes.

Etaler le mélange de granola en petits domes sur une large plaque allant au four, en faisant en sorte de séparer les domes pour que l’air chaud circule entre eux. Mettre au milieu du four et faites cuire jusqu’à ce que la surface soit dorée, environ 15 minutes. Retirer du four et mélanger délicatement à l’aide d’une cuillere en bois pour detruire les petits domes. Remettre et four pour encore 15 minutes. Ressortir du four et mélanger encore et ceci jusqu’à ce que le granola soit déshydraté et d’une belle couleur dorée. Cela m’a prit environ 30-45 minutes du début de cuisson jusqu’à la fin.

Laisser refroidir sur une grille a pâtisserie avant de servir. Le Granola se conservera dans un bocal à fermeture hermétique a temperature ambiante. Servir au petit déjeuner avec du lait, yaourt et fruits ou selon vos goûts et désir.

Thursday, September 20, 2007

Apples Season / La Saison des Pommes

Apple and Rosemary Muffin


You know autumn is right around the corner when apples start flooding markets and roadsides. While apples aren’t my all time favorite fruit, in part because I’ve always associated them with strict diet and hungry nights, I love using them in baking and salads.
Apples are not only a good source of vitamin C and antioxidants, they are also a very versatile fruit that can be transformed into jams, curds, sauces, preserves, chutneys, apple butter and more depending on your creativity and the varieties.
As I enjoy snacking with a Gala apples or a Golden Delicious, my favorite varieties of apples to bake with are Rome Beauty, Pink Lady and Granny Smith.
For this season of apples I started with apples and rosemary muffins for Sunday breakfast. Adding rosemary to the recipe was my personnal touch to a simple apples and nuts muffins. The combination of apples and rosemary might seem odd at first, but you will discover that the rosemary being slightly bitter and fragrant actually gives a nice smokiness and warmth to those moist muffins, different from the usual bland fruity muffin.
I used Golden Delicious for this recipe but you can use any kind of apples appropriate for baking, making you kitchen smells like an orchard, smells like autumn, smells like home sweet home.

Apples and Rosemary Muffins


Apples and Rosemary Muffins

Recipe: adapted from here
- 1 cup plain flour
- 1 cup whole wheat flour
- ¼ cup oat bran or wheat bran
- 2 tsp baking powder
- ½ tsp baking soda
- ¼ tsp salt
- 1 tsp ground cinnamon
- 2/3 cup firmly packed brown sugar
- 2 large eggs
- 1 ½ cups plain yogurt or buttermilk
- ¼ cup unsalted butter, melted
- 1 ¼ cups grated, peeled and grated apple (about 1 large)
- 1 tsp rosemary leaves, chopped
- ½ cup golden raisins
- 1 small apple, silvered
- 2 tbsp granulated sugar mixed with 1 tsp ground cinnamon

In a large bowl, stir together the flours, bran, baking powder, baking soda, slat, cinnamon, and brown sugar. Set aside.
Beat the eggs on low speed until blended, and then beat in the yogurt and butter. Add the dry ingredients and mix on low speed just until half moistened. Add the apple, raisins, and rosemary and stir just until evenly distributed. Do not over mix.
Spoon the batter into buttered muffins cups. Put a thin slice of apple on each muffin and sprinkle the cinnamon sugar evenly over the top. Bake in a preheated 400F oven for 15-18 minutes.
Let the muffins cool in the pan on a wire rack for 2 minutes, and then turn out onto the rack. Store in an airtight container at room temperature for up to 2 days or freeze for up to a month.

Apple and Rosemary Muffins


Muffins aux Pommes et Romarin


In francais please: adaptée d’ici
- 155g de farine
- 155g de farine complete
- 20g de flocons d’avoine
- 2 c.c de levure chimique
- ½ c.c de bicarbonate de soude
- ¼ c.c de sel
- 1 c.c cannelle
- 155g de sucre brun
- 2 gros oeufs
- 375g de yaourt nature
- 115g de pommes, épluchées et râpées
- 1 c.c de romarins, finement haché
- 60g de raisins secs
- 2 c.s de cucre mélange avec une c.c de cannelle
- 1 petite pomme, coupée en fines tranches

Dans une grande jatte, mettre la farine, avoines, levure, bicarbonate, sel, cannelle et sucre brun. Mettre de coté.
Battre les oeufs legerement, puis ajouter le yaourt et le beurre et battre. Ajouter ensuite les ingredients secs et mélanger juste pour que tout soit bien incorporé. Ajouter les pommes, les raisins et le romarin et mélanger. Ne pas trop mélanger.
Verser la pate a muffins dans un moule a muffins beurré. Mettre une fine tranche de la pomme sur chaque muffin et saupoudrer de sucre/cannelle le dessus de chaque muffin. Faites cuire dans un four préchauffé a 200C pendant 15-18 minutes. Laisser refroidir 2 min dans le moule puis demouler les muffins sur une grille de patisserie.
Ces muffins se gardent dans une boite hermétique a temperature ambiante pendant 2 jours ou peut se congeler jusqu’a 1 mois.

Tuesday, August 14, 2007

Some Tips and a Recipe / Des Astuces et une Recette

Strawberry Jam


Picture this: Less than three years ago, a young woman stands in the middle of a grocery store. She is lost. She just started to learn about the country and the language and why do people use the word “stuff’ for everything, and she is lost in the middle of a grocery store. Standing in the breakfast section in front of a gigantic range of jams, she reads all these labels: jam, preserve and jelly. She is lost. She knows what jelly is, but what about the two others? What’s the difference? Which one is "confiture"? She starts looking at the consistency of each and every one of them to figure out which one is jam. She didn’t expect to see all these names. Looking for a sign, some help, a dictionary may be. She goes back and forth, watching what people would pick the most from this pile of sugary jars. She figured this might help her. No, still lost. She finally picked the one that looked the most familiar to her, hidden in the world section and written in French: Bonne Maman apricot jam. She went back home, turned her laptop on and looked for the definition: Properly, the term jam refers to a product made with whole fruit, cut into pieces or crushed. The fruit is heated with water and sugar to activate the pectin in the fruit. The mixture is then put into containers*.
The term Preserves is usually interchangeable with Jam, however some cookbooks define Preserves as cooked and gelled whole fruit (or vegetable), which includes a significant portion of the fruit**.

So jam and preserve are the same, she tought. Why do they make it sound so confusing?
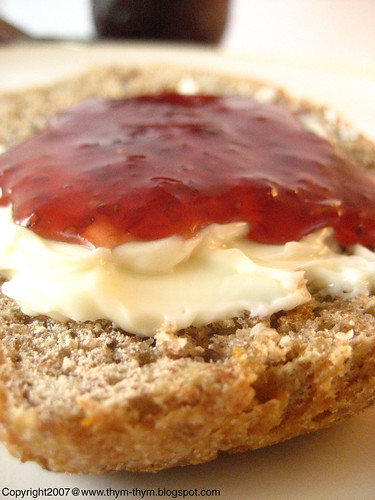
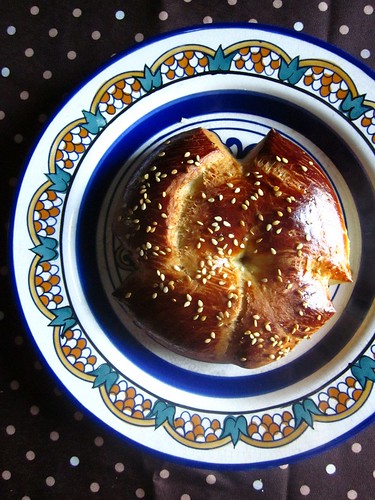
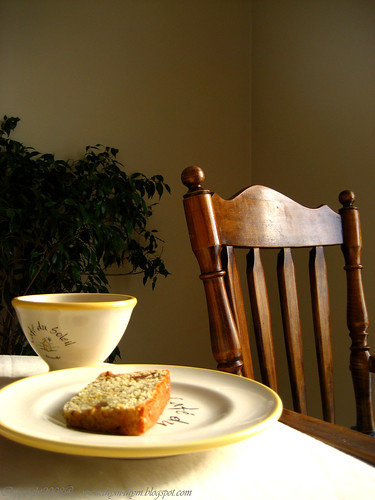
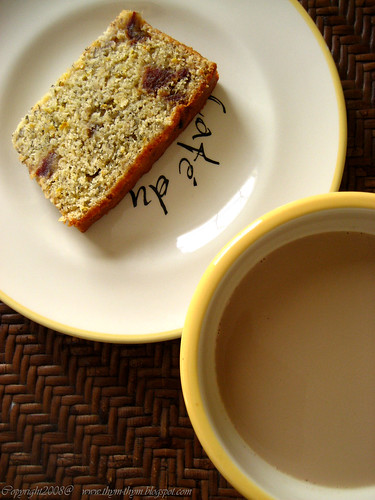
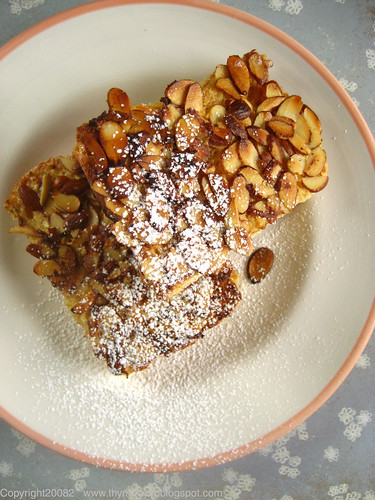
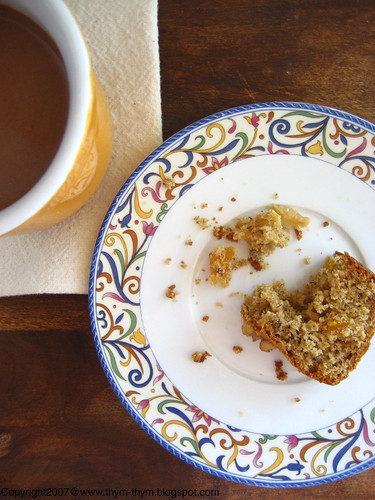
Lost, she was no more. Came the summer, she was determined to make her own pots of jams for the winter to come. This way the only dilemma she would have to face will be to either spread her jam on a slice of Rye and orange bread or a tart shell.

Tartine

Before we get to the recipe, allow me to share with you some tips and basics about making jam:
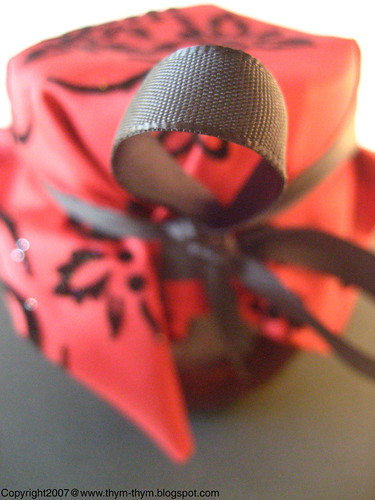
Jam jars should have lids and rings that help creat a vaccum seal. Ball and Kerr are good brands to use. When sterrilizing your jars, use canning tongs, specifically made for gripping jars. They are very helpful.
Some fruits (like apricot, pear, mango, watermelon, green tomatoes..etc) need to macerate in sugar for 24h before cooking them. Adding lemon juice when starting the cooking process help preserve the natural color of the fruit.
Usually the rule goes, for every 2 pounds(1 kilo) of fruits add 1 ½ lb(750g) sugar or 1 1/3(600g) if the fruits are too sweet.
The success of a good jam resides between the time of cooking( not too long and not too short) and the balance between acidity and fruit pectin. It goes from 20 to 45 min of cooking, depending on the fruits. Some fruits, lacking in pectin, might need more time to cook. But you should:
1- always keep an eye on them.
2- Have them on medium-high heat and stiring regularly.
3- Never put the lid on as it will overflow and you also want the jam to thicken by evaporating.
4- Skim the foam that might form on top.
If you have a copper pot, use it to make jams. It is the best tool, according to chefs, for jams. It conducts heat evenly and alows pectin molecules to interact between themselves.
If your jam has crystallized, slowly add some boiling water to dissolve it.
An easy tip to know when your jam is ready: Put a little bit of it in a spoon and set aside for 30sec. If it rinkles when touching it with your pinkie, then it’s ready. If not continue cooking it a bit more. Try again later.
Some fruits jam combinations:
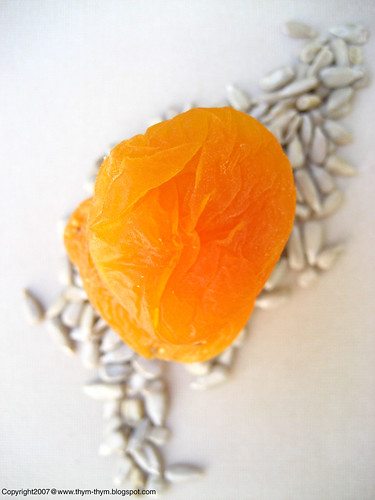
- Apricot: almonds, honey, ginger, vanilla, walnuts and lavender
- Cherry: Kirsch, Rhum and vanilla
- Lemon: Orange blossoms and vanilla
- Strawberry: black pepper, balsamic vinegar, raspberry, blackberry
- Raspberry: black pepper, strawberry, thyme, blackberry
- Pear: cinnamon, red wine
- Peach, nectarine: Vanilla, walnuts, ginger, clove, lemon, bitter almonds
- Apple: vanilla, cinnamon, anis star, cardamom, lemon balm, rhum, lavender, rose water, mint.
- Squash: orange zest, anis star
- Rhubarb: lemon, raisins, cinnamon, apple

Tartine

Strawberry Preserve

Recipe: adapted from Food and Wine, July 2007
- Juice of 2 lemons, strained
- 4 ½ cups sugar
- 2 pounds medium strawberries, hulled


In a large, deep skillet, pour the lemon around the sugar. Cook over medium heat undisturbed until most of the sugar starts to melt. Gently stir the sugar until completely melted. Using a moistened pastry brush, wash down any sugar crystals from the side of the skillet.
Add the strawberries and boil over medium-high heat, mashing them gently then, if you don’t like to have pieces of strawberries in your preserve, puree them using a long stand mixer. Let it cook until it reaches 220F (or 8 degrees above boiling point, depending on altitude), about 10 min. Continue to boil until the preserves are thick, about 4 min longer.

 Strawberry Jam


Confiture de Fraises

Recette: adaptee de Food and Wine, Juillet 2007
- Le jus de 2 citrons, passé a la passoire
- 1,064 l de sucre
- 900g de fraises de taille moyenne, equeutees

Dans une marmite profonde, verser le jus de citron autour du sucre. Faire cuire sur feux doux, sans le remuer jusqu’a ce que le sucre commence a fondre. Remuer le sucre doucement a l’aide d’une cuillere en bois pour que le sucre soit completement fondu. A l’aide d’un pinceau a patisserie, legerement mouille brosser doucement tous cristaux qui peuvent se former autour du sucre.
Ajouter les fraises et porter a ebullition sur feu relativement élevé. Ecraser les fraises ou si vous ne voulez de morceaux dans votre confiture, broyer le tout a l’aide d’un mixeur a soupe. Laisser cuire jusqu’a ce que la confiture atteigne 104 C (ou 4 degres au-dessus de l’ebolution dependant de l’altitude), environ 10min. Laisser bouillir, sans couvrir encore 4 min, ou jusqu’a ce que la confiture soit epaisse.

*,**: Wikipedia
Source: Supertoinette.com

Thursday, July 12, 2007

Help The Children / Aidez Les Enfants

Brioches


The purpose of this post today is to bring your attention to a very important fund raising campaign that is happening across the country to help stop childhood hunger in America. As mentioned in The Food Network, The Great American Bake Sale is hosting its fourth national campaign where people, from everywhere in the country can host their own bake sale and donate the entire profit of the sale to Share Our Strength to help end childhood hunger.
The following text is extracted from Share Our Strength website.

Tonight over 12million children in America will go to bed wondering if they will have something to eat in the morning. A survey conducted in February by the Broward Regional Health Planning Council and paid for by the Children’s Service Council showed that nearly two-thirds of low-income families can’t always afford to give their children a balanced meal.
It is hard to believe that in a country with unlimited resources, millions of children are at risk of hunger.
13.4 million children in America live in poverty today, representing roughly 1 in 6 children. More than 13% of Americans- 38 million – live below the poverty threshold of $19,800 for a family of four. The scientifically recognized consequences of hunger are both devastating and lifelong: poorer overall health, reduced social and psychological well-being; and lower academic achievement. This is why Share Our Strength’s Great American Bake Sale believes that America can- and must – end childhood hunger by providing a fun and easy way for individuals, families, business, students and organizations to make a difference for those children at risk of hunger.
Share Our Strength, one the nation’s leading organizations working to end childhood hunger in America invite participants to host their own bake sale anywhere in the US from May 19- August 31 and send their proceeds to Share Our Strength to help organizations in their community end childhood hunger.
Since 2003, the campaign has raised over $3 million and engaged more than 1 million people in baking, selling or buying goods.
Because no child deserves going to bed hungry, we invite each and every one of you to get your muffins, cupcakes and brownies pans, have some friends to join the fun and start the fight to stop Childhood Hunger in America one cupcake or one brioche at a time.


Recipe: Makes 20 little brioches
- 2 ¼ cups white flour, plus extra for kneading
- Pinch of salt
- 3 tbsp superfine sugar
- 1 package dry yeast
- 3 eggs, beaten, plus extra egg for glazing
- 3 tbsp warm milk
- ½ cup unsalted butter
- Dark chocolate, broken into squares

Sift the flour and salt into a bowl and stir in the stir in the sugar and yeast. Add the eggs and milk and start incorporating it slowly to the dry ingredients. Knead until the dough is fairly soft and elastic. The dough should feel softer and lighter than bread dough. If the dough is too sticky, add flour a little at a time while kneading. Add the butter to the dough, a few pieces at a time, alternating it each time with a little bit of flour to help the butter get into the dough. When all the butter has been incorporated, transfer the dough to a clean, lightly oiled bowl. Cover it with plastic film and let it rise for at least 1 hour in a warm, draft-free room.
Lightly grease 20 individual brioche tins set on a baking sheet. Divide the brioche dough into 20 pieces and shape each into a smooth ball. Place a small chocolate square into each ball and bring up the sides of the dough while pressing the edges firmly together to seal. Smooth the ball by rolling it between your hands and place it, join side down, in the prepared tins. Continue with the remaining brioche pieces, cover and leave them for about 30 min or until doubled in size.
Brush the brioches with beaten egg and bake in a preheated 400F for 12-15 min, until well-risen and golden brown. Let cool on a wire rack slightly, turn out of the pan and serve warm.

Tips: If you intend serving the brioches for breakfast, the dough can be left overnight in the fridge. Brioches freeze very well for up to a month. Thaw overnight at room temperature, and then reheat on baking sheet in a low oven until warm.


Brioche


Brioches faciles au Chocolat

In francais please: Pour 20 petites brioches
- 250g de farine, plus un peu pour le petrissage
- Une pincee de sel
- 3 c.s de sucre
- 3 oeufs, battu legerement plus 1oeuf pour badigeonner
- 3 c.s de lait tiede
- 115g de beurre, coupe en petits morceaux
- Chocolat coupe en des

Tamiser la farine et les sel dans un grand bol. Ajouter le sucre et la levure, puis verser dessus le lait et les oeufs. Incorporer doucement le malange lait a la farine. Petrir la pate jusqu’a ce qu’elle devienne lisse et souple. Si la pate est collante ajouter la farine petit a petit tout en petrissant. La pate doit avoir une constistence plus legere que celle du pain. Ajouter les morceaux de beurre petit a petit, en alternant a chaque fois avec un peu de farine pour faciliter l’absorption du beurre par la pate. Quand le beurre est entierement incorpore, transvaser la pate dans un bol propre et legerement huile. Laisser reposer pendant 1 h, ou jusqu’a c que la pate soit double. Diviser la pate en 20 petits ronds. Dans chaque rond, mettre un petit morceau de chocolat et rabattre les bords dessus. Rouler en boule et mettre dans des moules a brioche huiles en faisant en sorte que la “fermeture” soit dessous. Continuer avec le reste des brioches. Couvrir les brioches d’une serviette et laisser reposer 30 min. Badigeonner les brioches de l’oeuf battu et faire cuire dans un four prechauffe a 200 C pendant 12-15. Laisser refroidir sur une grille a patisserie et servir tiede.

Petites astuces: Si vous compter servir les brioches au petit dejeuner, vous pouvez laisser la pate, avant de la former en boule, au frigo pendant toute la nuit. Les brioches se congelent trs bien pendant 1 mois. Laisser les brioches a temperature ambiante la veille, puis les faire chauufer dans un four doux. Servir tiède.


Chocolate Brioche

Thursday, July 5, 2007

Baking Forecasting / Prévision Culinaire

Apricot


ARIES
(March 21 –April 19)
Organization has never been your thing.
- How dare you! You don’t know me, I mean; yes …I can be…sometimes…but not always.
Your ruler; Mars, is driving you to get the big stuff done- like finding the perfect pair of furry boots, or getting your MySpace profile just right.
- Note the signification of “The big stuff”! We are in July; I don’t think I would need some furry boots. As for MySpace profile, I don’t have one anyway.
You’ll be quite accomplished in 28 days’ time.
- It will take that long! Why not 26 days? Does it have to do with my lack of organization? What should I do in the meantime? Sleep!
You’ll also be more intense than usual. A pleasantly casual hookup? Not on the schedule this month.
- Wait a second: you first accuse me of being disorganized, and then superficial, then slow and now you say that I am “intense!” What does it mean? Do you have something against Aries? And for your information, I am married so back up couple breaker!

Apricots- Nuts Bread

Here is how I would rewrite my own, personalized Horoscope of the week:

ARIES
(March 21 –April 19)
As the week begins, you will feel the need to get things done, to battle the winds, read your forgotten Marguerite Duras’ books and go back to the gym, something you have been talking about 3 months ago, but don’t wait too long as the weather man has predicted some rain for Tuesday and Wednesday and being active during bad weather has never been your thing. We don’t say this often, but it’s time to look like a woman a little bit, a little make up doesn’t hurt! Make a trip to the store near you where they have 75% sale on select cosmetics. A steal!
Tuesday will be your day of great baking achievement. You will finally make the apricot-nuts bread of your dreams that wasn’t that good a couple of weeks ago. At least now you know that starting to bake something, without making sure that you have all the ingredients is stupid; and why we said previously that organization has never been your thing!

Apricots-Nuts Bread

Apricot- Nuts Bread


Recipe:
- 1 ½ cups plain flour
- ½ cup rye flour
- 1 ½ tsp baking powder
- ½ tsp baking soda
- ¼ tsp salt
- 1 tbsp grated lemon zest
- ½ cup walnuts, toasted and chopped
- 1 tbsp crystallized ginger, finely chopped
- 12 dried apricots, diced
- 1 tbsp sunflower seeds
- 2 large eggs
- ¾ cup firmly packed golden brown sugar
- 6 tbsp unsalted butter, melted
- ½ cup whole milk

Position a rack in the middle of the oven, and preheat to 350F. Butter and flour a 9-by-5-inch loaf pan.
Stir together the flours, baking powder, baking soda, salt, zest, ginger, apricots and nuts. Set aside.
In a large bowl, combine the eggs, brown sugar, butter, and milk. Beat just until blended. Add the dry ingredients in 3 batches and mix just until mixed. Do not overmix.
Pour the batter into the prepared pan and smooth the top with a rubber spatula, which you lightly wet (it helps a lot). Bake until a toothpick inserted comes out clean, 55-60 min. Transfer to a wire rack and let cool, first 5 min n the pan, then turn it out onto the rack and cool completely. You can store it in an airtight container at room temperature for 2-3 days or freeze it for up to a month.

Pain d’Abricots et de noix

Slices Of It


In francais please:
- 235g de farine
- 75g de farine de seigle
- 1 ½ tsp de levure chimique
- ½ c.c de bicarbonate de soude
- ¼ tsp de sel
- 1 c.s de zest de citron
- 60g de noix, grilles legerement et hachees
- 1 c.s de gingembre crystalise, hache
- 12 abricots secs, coupes en des
- 1 c.s de graines de tournesol
- 2 gros oeufs
- 185g de sucre brun
- 90g de beurre, fondu
- 125ml de lait entier

Positionner votre grille au milieu du four et prechauffer a 180C. Beurrer une moule a cake de 23 cm de longueur sur 13 cm de largeur.
Melanger ensemble les farines, la levure chimique, la bicarbonate de soude, le sel, le zest, le gingembre, les abricots et les noix. Mettre de cote.
Dans un grand bol, melanger les oeufs, le sucre brun, le beurre et le lait jusqu’a ce que le mélange soit homogene. Ajouter les ingredients secs en 3 fois et melanger jusqu’a incorporation complete. Eviter de trop melanger.
Mettre votre pate dans le moule a cake prepare et lisser la surface avec une spatule en caoutchouc ou une cuillere en bois, que vous mouillez legerement. Faire cuire jusqu’a ce qu’un cure-dent insere dans le pain en ressorte propre, 55-60 min.
Laisser votre pain refroidir sur une grille a patisserie, d’abord 5 min dans le moule puis demouler et laisser refroidir completement sur la grille. Le pain se garde parfaitement dans une boite hermetique a temperature ambiante, pendant 2 a 3 jours comme il peut etre congele jusqu’a 1 mois.

Pause Chocolat chaud

Wednesday, June 27, 2007

Daring Bakers Challenge: Bagels

IMG_3237


Before this month’s challenge I thought I didn’t like bagels, American bagels that is. The few bagels that I had until now were not memorable: too plain, too chewy, too tough; in other words, bad memories. Making bagels was really challenging for me since I have never made this kind of bagels before and have no experience on how the real bagel should taste or feel like. For me the kind of bagels that I grew up eating and loving has a texture crossed between bagels and brioche and flavored with anis seeds, sesame seeds and orange zest. I then decided to seek some advices from some bakeries around where I live, explaining them my situation, without broking my daring baker pledge of course. I really wanted to know what makes a bagel, a bagel and how to make sure that my bagels don’t float, since the water bath was the thing that scared me the most. Some baker were nice enough to take the time and explain it to me and some thought I was trying to steel their secret recipe. Some bagels were good; some of them were not that good.


IMG_3236


Days went by when I started checking with some studious fellow daring bakers that had already tried the bagel recipe. Two words came back over and over again: floating and sinking. My fear of the water bath for the bagels was then multiplied by one hundred.
Then came the Bagel Day. I followed the recipe while taking notes of my friend’s advices. Come the water bath stage and here I see all my bagels floating. Not only they were floating but also they were getting bigger and deformed. I thought about sinking them my self but then I remembered that I should only stick to the recipe. The result: my first batch of bagels was ugly, shameful, misshapen and chewyliscious. Yes, I even invented a word for them.
I was so disappointed, I told my self that I would never make bagels or eat bagels or even look at a bagel again. But then I remembered what the foundation of the daring bakers was all about. It is about trying once, twice until you learn. It’s about being patient and trying to see objectively what went wrong. What went wrong with my dough? I overproofed the yeast. Yes, you read it right, not the dough, the yeast: You know, the first stage when you mix the yeast with the water and you are supposed to let it rise 5 min, well with me I left it 30 min. From there, everything went super puffy.


IMG_3240


The following day, I started all over again: the yeast, 5 min this time, didn't add all the flour, kneading well and harder, punching down the dough with all the muscles that I don’t have, trying to shape as little as possible and using malt syrup instead of sugar. The result: Although not all the bagels went straight to the bottom of the pan, 5 out of 7 came out just as they were supposed to. They didn’t have the same shape but I was pretty happy with the result. The texture was just a little chewy with a lot of softness to it. For some people, it might not taste as a bagel but for me it was just the way I like it. I used sesame seeds and kosher salt as a topping for half of my bagels and poppy seeds, sesame seeds and garlic flakes for the others. As a filling I used Nutella instead of cream cheese and the garlic bagels were used as a sandwich bagels with lettuce, goat cheese and turkey patties. Sorry if I don’t have pictures of them but I couldn’t wait to eat them.
Once again thanks to Jenny and Freya for this challenge that made me appreciate the real, homemade bagel. You can head to their respective blogs for more details on the recipe.


IMG_3253

Thursday, June 14, 2007

Soothing Muffin / Muffin Calmant

Soothing Muffin


Nice, France: August 16, 2003

I’ve been here for two weeks now. My internship is going very well although it is very hard sometimes to wake up at 7am after going to bed at 2am. Nice is so beautiful: La promenade des Anglais, La colline du Chateau, The Old Town, The flower market, the food, Oh the food! I haven’t seen everything yet but I just can’t wait to explore what Nice has to offer.

The only thing that I don’t like about Nice is the beach. The beaches of Nice are shingle and now my toes are all sore and it hurts. Well, I guess I will get used to it.

Today my sister and my nephew came to see me. I was so excited. We went strolling along the beach then went to The Old Town to have some ice cream. A friend of mine told me that you would find the best ice cream there. We had to check it out. We weren’t disappointed. The counter of ice cream was 6 feet long, with over 30 varieties of ice cream, gelatos and sorbets.

My sister went straight for her favorite flavor: caramel and coffee ice cream and I went for a flavor that caught my eyes right away: Lavender ice cream. A bite of it and I had the feeling to be… a dirty shirt inside a washing machine. The lavender ice cream reminded me of a fabric softener. It was too much lavender for me and I couldn’t finish it. My sister was really enjoying her ice cream, licking every drop that would fall on the sides. And I was there watching her.

What a torture!

Michigan, USA: June 10, 2007

Yesterday I bought a bag of lavender flowers. I was torn between making some muffins or sables. I went for muffins. I have never been scared of flowers before, but since my ice cream experience I am just terrified of everything that involves flowers and food together. I love the smell of lavender, I find it very calming but I just couldn’t imagine how it would taste in a muffin.

I took a basic vanilla muffin recipe and turned it into a lavender, lemon and pine nuts muffins. “Breath, Rose! Breath!” I was telling my self all the time. Once the lavender was mixed into the batter I could have sworn I was in a lavender field. It smelled like spring. Into the oven, 25 min later I had my muffins and they were beautiful. “Don’t rush it Rose! Let it cool completely then you can have a taste”.

My fear of lavender scent fabric softener was gone once I had those muffins. They were so fragrant, yet not overpowering. There was just the right amount of lavender. The only thing that I would add next time to the batter is some honey because it needed a little bit of sweetness. M thought they were “interesting”.
What? What does he mean, “interesting”? Have a lavender ice cream, Honey! That’s very “interesting”.

Lavender, Lemon and Pine nuts Muffins


Recipe:

- 1 ¾ cups plain flour
- 2 tsp baking powder
- ½ tsp baking soda
- ¼ tsp salt
- ¾ cup granulated sugar
- 1 tsp dried lavender flowers
- 1 tbsp candied lemon peels
- 1 ½ tbsp toasted pine nuts
- 2 large eggs
- 1 cup whole milk
- 6 tbsp unsalted butter, melted

In a bowl, stir together the flour, baking powder, baking soda, salt, sugar, lavender, pine nuts and candied lemon peels.
In another bowl, Combine the eggs, milk, and butter and beat just until blended. Add the dry ingredients and mix just until moistened. Do not overmix.
Spoon the batter into prepared muffin cups, filling each cup about three-fourths full. Preheat the oven to 425F and bake for about 15-18 min or until a toothpick inserted comes out clean. Let cool on a wire rack. Sprinkle some icing sugar on top. Store in an airtight container at room temperature for up to 2 days or freeze for up to 1 month.


Soothing Muffin


Muffins a La Lavande, Citron et Pignons de pin

In francais please:

- 280g de farine
- 2 c.c de levure chimique
- ½ de bicarbonate de soude
- ¼ c.c de sel
- 155g de sucre en poudre
- 1 c.c de fleurs de lavande, sechees
- 1 c.s de pelures de citron confites
- 1 ½ c.s de pignons de pin
- 2 gros oeufs
- 250ml de lait
- 90g de beurre, fondu

Dans une grande jatte, melanger la farine, la levure, la bicarbonate de soude, le sel, le sucre, la lavande, les pignons de pin et le citron.
Dans un autre bol, melanger les oeufs, le lait et le beurre jusqu’a ce qu’ils soient bien incorpores. Verser dessus les ingredients secs d’un seul coup et melanger. Ne melanger pas trop. Verser dans des moules a muffins et faites cuire dans un four prechauffe a 220C pendant 15-18 min. Laisser refroidir sur une grille a patisserie. Saupoudrer de sucre glace. Ces muffins se gardent pendant 2 jours dans une boite hermetique ou peut se congeler pendant un mois.


Soothing Muffin

Tuesday, May 22, 2007

Challattone!


Don’t try to look this word up in the dictionary or any cookbook because it doesn’t exist.
What is Challattone?

Challattone is what happened when a woman wants to surprise her husband, a panettone fanatic, but doesn’t have a Panettone recipe.
What did she do?

She took a Challah bread recipe and turned it into a fake panettone by adding candied fruit peels and golden raisins. The result: Challattone.
Why did she choose the Challah recipe? Why not brioche?

Well, the woman thought the texture of Challah is closer to the Panettone, and making brioche can be too much work for her. The woman can be lazy sometimes.
So, making Challah bread is easier than brioche?

It is supposed to be easier, but not for this woman who has a funny way reading a recipe: first, she reads the ingredients, then reads the first part of the preparation then jumps to the baking time. What she forgot is that bread needs to rise twice. The result: going to bed at 2 AM.
Did they enjoy the bread?

They did. Challattone was far from tasting like a Panettone but it was a good and fragrant Challah bread. The husband is still hoping to have a warm, homemade Panettone for breakfast and the woman is still up for the challenge but this time she is armed with an authentic Panettone recipe and can’t wait to try it.
To be continued…


Challattone

Recipe: Challah adapted from Williams-Sonoma: Essentials of Baking


- 5 tsp active dry yeast
- 1 cup warm water
- ½ cup sugar
- 3 large eggs, plus 1 egg, beaten for glaze
- 5 cups all purpose flour
- 2 tsp salt
- ½ cup unsalted butter, at room temperature
- 2 tbsp candied fruits peels ( such as orange and lemon)
- 1/2 cup golden raisins

In the bowl of a stand mixer, dissolve the yeast in the warm water and let stand until foamy, about 5 min. Add the sugar, 3 eggs, 4 ½ cups of the flour, the salt, the candied fruit peels, the raisins and the butter. Attach the dough hook and knead on low speed, working in the remaining flour as necessary, until the dough is smooth and elastic, 5-7 min. Do not be tempted to add to much flour. The dough should stay soft and it will become less sticky with kneading.
Form the dough into a ball and transfer it to a lightly oiled bowl. Cover with a damp kitchen towel and let it rise for 2 hours.
Line a sheet pan with parchment paper. Punch down the dough and transfer it to a clean work surface. Make a braided loaf as shown in the pictures or you can make rolls or knots. Place the bread on the prepared sheet pan. Cover with a dry kitchen towel and let it rise for 45-60 min. Position a rack in the lower third of the oven, and preheat to 350F. Brush the bread gently with the beaten egg. Bake the bread until it is nicely browned and sounds hollow when tapped on the bottom, 30-35 min. Transfer to a wire rack and let cool completely.


Challattone

In francais please:
Challah adaptee du livre de Williams-Sonoma: Essentials of Baking

- 5 c.c de levure boulangere
- 250 ml d’eau tiede.
- 125g de sucre
- 3 gros oeufs, plus un oeuf battu pour badigeonner
- 780g de farine
- 2 c.c de sel
- 125g de beurre doux, a temperature ambiante

- 2c.s de pelures de fruits confits ( oranges et citron)
- 200 ml de raisins secs.

Dans le bol d’un petrin, dissoudre la levure dans l’eau et laisser fermenter, 5 min environ. Ajouter le sucre, les 3 oeufs, 700g de farine, le sel, le beurre et les fruits. Placer le bol dans votre petrin et commencer a petrir a vitesse minimale en ajoutant la farine petit a petit, si necessaire, jusqu’a ce que la pate devienne elastique et lisse, 5-7min environ. Ne soyer pas tente d’ajouter trop de farine puisque la pate doit etre souple et elle finira par etre moins collante avec le petrissage.
Rouler la pate en boule et mettre dans un bol huile. Couvrir d’un torchon humide et laisser reposer pendant 2 heures.
Garnir un plat allant au four de papier sulfurise. Donner un coup de poing a la pate et la transferer vers une surface de travail propre. Vous pouvez soit tresser le pain comme dans les photos soit les mettre en forme de petits pains ou de noeuds. Mettre votre pain dans le plat prealablement prepare. Couvrir d’un torchon sec et laisser reposer 45-60 min.
Positionner la grille de votre four sur le 3eme etage en conptant de haut et prechauffer a 180C. Badigeonner votre pain soigneusement avec l’oeuf battu et cuire jusqu’a ce qu’il devienne dore et semble creux quand vous le taper legerement en dessous. Laisser refroidir completement sur une grille a patisserie.

Wednesday, April 11, 2007

Une Douce Resolution / A Sweet Resolution


Last weekend, my husband and I decided to start a new Sunday tradition. We agreed to make Sunday the day when we would have the most special breakfast of the week. No more 8 minutes breakfasting, no more cold tartines and no more glass of orange juice on the go. We would have a nice and quiet breakfast full of goodies and giggles and packed with calories. So, I thought that the better way to start this tradition is to make crepes, my all time favorite.
When it comes to crepes, my husband and I have different points of view about how we like to eat them. I like chocolate crepes. He likes plain, vanilla crepes. I top my crepes with a little bit of sugar or orange jam. For him it’s definitely Nutella. I roll my crepes like a cigar and dunk them in my bowl of milk. He folds his crepes like a triangle and hates it when I dunk my crepes in my bowl. Basically, we are different but we both enjoy having crepes for breakfast anytime of the day.
I tried many, many plain crepes recipes since I was a teenager and this one is by far my favorite. For the chocolate crepe it’s adapted from the book Chocolate desserts by Pierre Hermes. The chocolate batter reminded me of hot chocolate. It was velvety and so dark. I wanted to have a sip of it right away. After cooking my crepes, the taste of cocoa was a little overpowering for me. May be because I forgot to add sugar to the batter. Seriously, I did! Other than that, it was really good and really chocolaty.
I think I have to give it another try to make sure that the bitterness of the cocoa was because of me omitting to add the sugar.
Well, looks like another day of breakfast bonanza is a must.

Recipe: Vanilla Crepes, for 6 to 8 people
- 14 ounces of all purpose flour
- 4 ounces of sugar
- 1 stick of salted butter
- 3 eggs
- 4 cups of whole milk
- 1 tsp of vanilla

In a saucepan, heat the milk and the butter just until the butter has melted. Put the flour, the eggs and the sugar in a blender. Blend until combined. Gradually add in the milk and butter mixture. Scrape down sides and blend for 15 sc more. Cover and let sit for at least 2 hours.
Heat a pan to medium high. Oil it very lightly. Drop about ¼ cup of crepe batter into the pan and tilt the pan with a circular motion so that the batter coats the pan evenly. You want the layer of crepe to be as thin as possible. Cook each side until golden brown (about 2 min for the first side and one min for the second). Gently remove and place on plate.

Chocolate crepes: Pierre Hermes recipe
- 3 oz of all purpose flour
- 3 ½ tbsp unsweetened cocoa
- 1 ½ tbsp sugar
- 2 large eggs at room temp
- 1 cup of whole milk
- 3 tbsp orange juice at room temp
- 2 tbsp melted butter

In a saucepan, heat the milk just until warm. Put the flour, the butter, the eggs, the sugar and the juice in a blender and blend until all combined. Gradually, add the milk. Blend for another 15 sec. Cover the batter and set aside for 1 h.
For the cooking, follow the cooking instructions of the vanilla crepes.


In francais please: Crepes a la vanille, pour 6 a 8 personnes
- 400g de farine
- 110g de sucre en poudre
- 100g de beurre sale
- 3 oeufs
- 1 litre de lait entier
- 1 c.c d’extrait de vanille

Dans une casserole, faites tiedir le lait et le beurre jusqu’a ce que le beurre soit fondu. Retirez du feu. Mettre la farine, le sucre et les oeufs dans un robot menager et mixer le tout. Ajouter doucement le mélange de lait et de beurre jusqu’a ce que tout soit bien incorpore.
Couvrir et laisser reposer la pate au moins 2 h.
Faites bien chauffer votre poele a crepes. Graisser avec un peu d’huile. Etalez une petite louche de pate. Laisser bien cuire un cote avant de faire sauter la crepe pour la retourner et faire cuire le second cote. Vous devez obtenir une couleur bien doree et des crepes bien fines.

Crepes au chocolat: recette de Pierre Hermes
- 95g de farine
- 3 ½ c.s de cacao non sucre
- 1 ½ c.s de sucre en poudre
- 2 oeufs entiers
- 250ml de lait entier
- 3 c.s de jus d’orange
- 30g de beurre fondu

Mettre la farine, les oeufs, le jus, le sucre et le cacao dans un robot menager et mixer. Ajouter doucement le lait tiede. Couvrir et laisser reposer 1 h.
Proceder pour la cuisson selon celle des crepes a la vanille.

Wednesday, March 28, 2007

Pancakes: Trois ans plus tard / Pancakes: Three years Later


The first American culinary experience that I had coming to the United States, about three years ago, was pancakes. My husband was telling me about them all the time, how fluffy they are, how you can eat them with whatever you want and how tasty they are.
I taught: “I love crepes! I might as well love pancakes”.
He used one of those pancake mix boxes: The taste was good but not enough to make me jump off my seat and the texture was fluffy but you have to drench the pancake in syrup to make it soft to your palate.
Three years later, it was time for me to renew the experience and to give the pancake another chance, but this time by doing it my way.

I have heard about ricotta pancakes and how good they are, and since I love ricotta I taught I will give it a try.
I browsed the internet to look for a recipe and I came across a ricotta and blueberry pancakes with a blueberry compote that had my name all over it. A quick run to the market to buy some blueberries and I was ready to take on the pancake challenge.
The result: It was completely different from the box experience that I had before; the mixture felt rich and a little heavy so I added more milk but other than that, after cooking it: it was light as a feather and so moist and flavorful. The ricotta balances the acidity of the blueberries, and the compote is not too sweet; just the right amount of sweetness.
The verdict: Pancakes are back in my kitchen and in my breakfast and this recipe is definitely a keeper.

Ricotta and blueberry pancakes with blueberry compote

Recipe: from Curtis Stone
- 4 eggs, yolks and white separated
- 11oz ricotta
- 8 fl oz milk
- 9oz all purpose flour
- 1 tsp baking powder
- Pinch of salt
- 11oz blueberries
- 4oz sugar
- 3oz butter

Mix the egg yolks with the ricotta and the milk and set aside. Sieve in the flour, the baking powder and the salt and stir well to combine. Whip the egg whites to a soft peak. Add a third of the egg whites to the ricotta mixture and stir in to loosen the mixture then gently fold in the remaining egg whites.
Add one third of the blueberries to the batter and put the rest in a pan with half the butter and the sugar. Simmer for a couple of minutes until some of the blueberries have collapsed.
Melt the remaining butter in a frying pan and add a ladle of the batter to the pan. Cook them until golden brown on each side.
Serve them with a drizzle of the warm blueberry compote.

Pancakes de ricotta et de myrtilles avec compote de myrtilles

In francais please: recette de Curtis Stone
- 4 oeufs, jaunes et blancs séparés
- 310g de ricotta
- 225ml de lait
- 255g de farine
-1 c.c de levure chimique
- Une pincée de sel
- 310g de myrtilles
- 110g de sucre
- 85g de beurre

Mélanger la ricotta, les jaunes d’oeufs et le lait. Ajouter-y la farine, la levure et le sel tamises. Battre les blancs en neige. Mettre le tiers des blancs dans le mélange ricotta et mélanger pour assouplir la pâte puis incorporer délicatement le reste (vous devez obtenir une pâte onctueuse mais pas aussi liquide que celle des crêpes).Ajouter le tiers des myrtilles a la pâte et mettre le reste dans une casserole avec le sucre et la moitié du beurre. Laisser cuire quelques minutes jusqu’a ce que quelques myrtilles «éclatent ».
Faire fondre le reste du beurre dans une poêle et mettre une louche de la pâte a chaque fois. Faire cuire des deux côtés jusqu’a ce qu’ils soient bien dorés.
Servir sur une assiette arroses de la compote de myrtilles tiède.